Quickstart KMP (iOS)
Instructions for adding the Group Link SDK to the iOS side of your Kotlin Multiplatform (KMP) application.
Step 1 - Opening the KMP project in Xcode
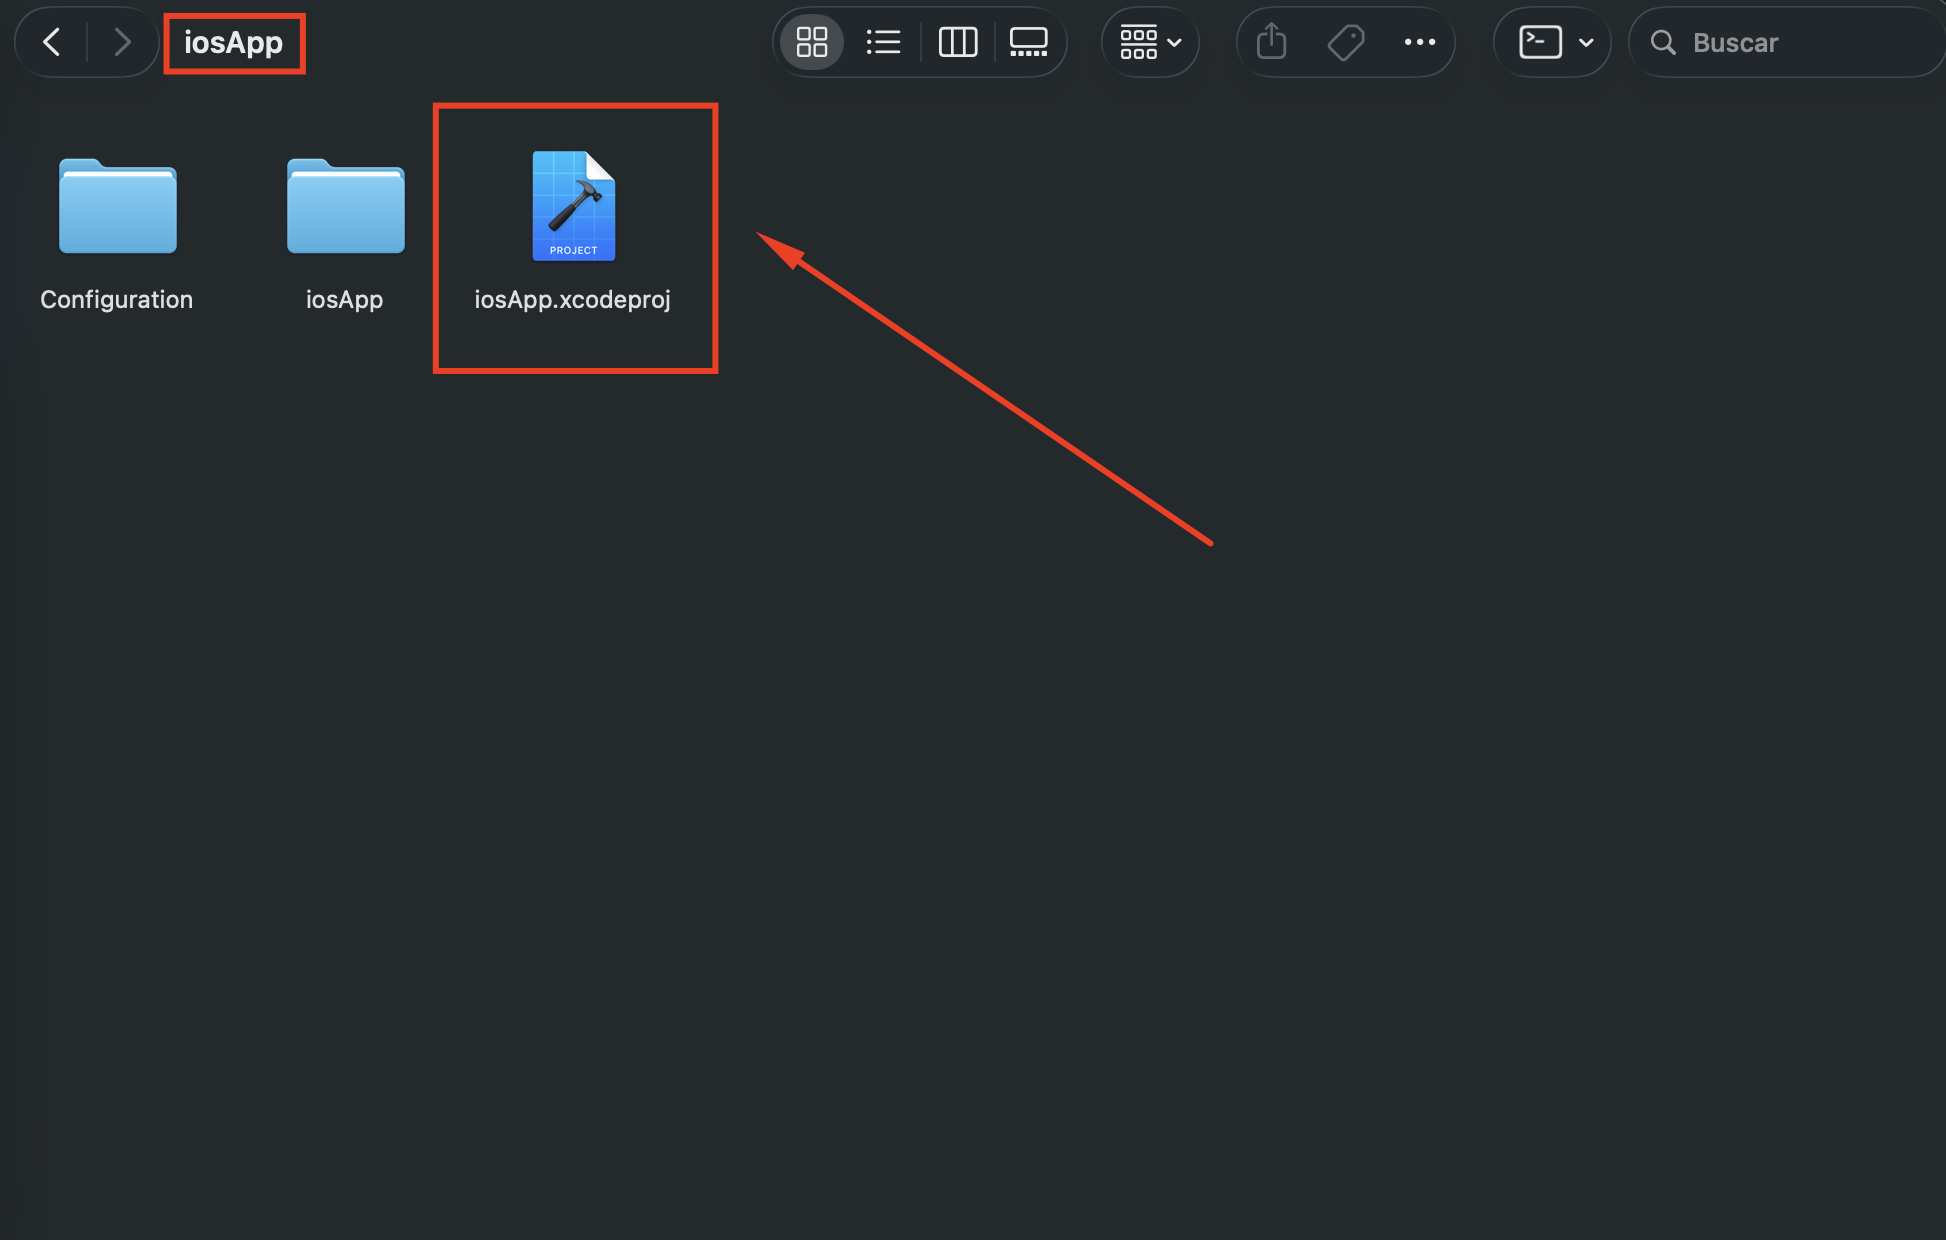
- Access the
iosAppfolder created by KMP. - Open the
iosApp.xcodeprojfile in Xcode.
Step 2 - Editing the Info.plist file using the Xcode visual editor
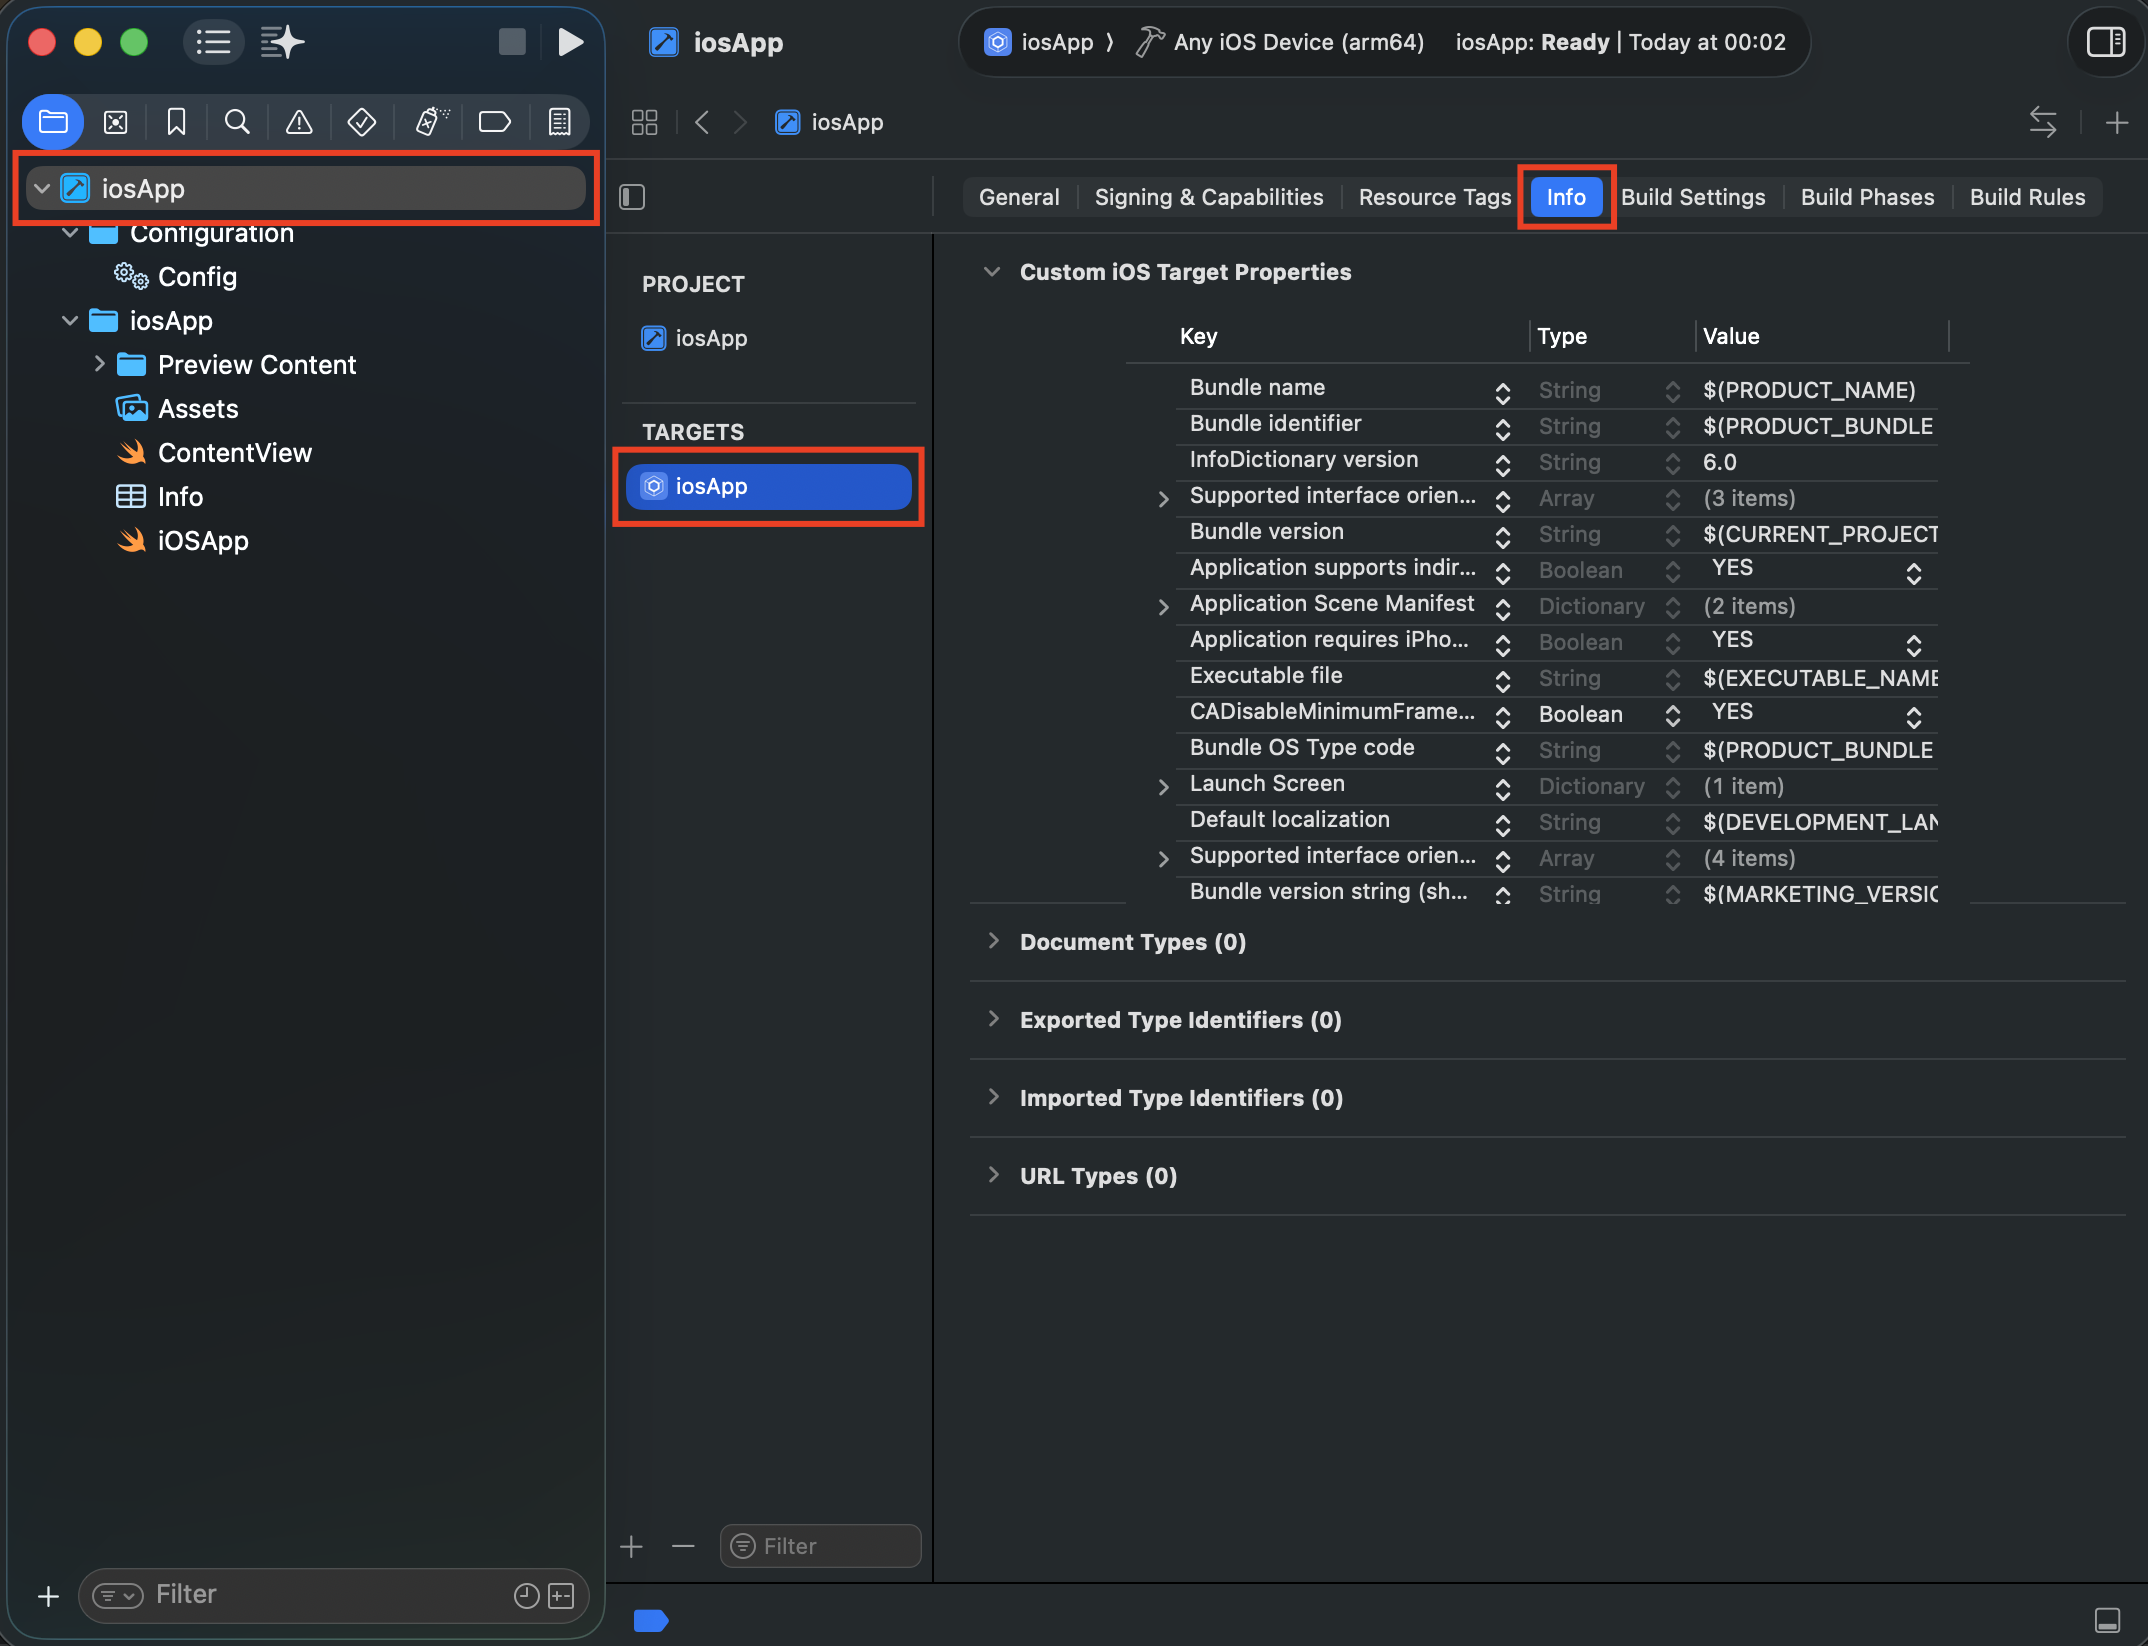
All permissions for your iOS application are listed in the Custom iOS Target Properties section of Info.plist.
- In the file browser (left panel), select your project at the top of the tree.
- Select the application's target in
TARGETS. - Access the
Infotab.
Step 3 - Adding permissions
Note: Description messages are displayed when the application requests permission from the user to use a service. Be sure to add a message that is meaningful to your users.
Enable Location Services
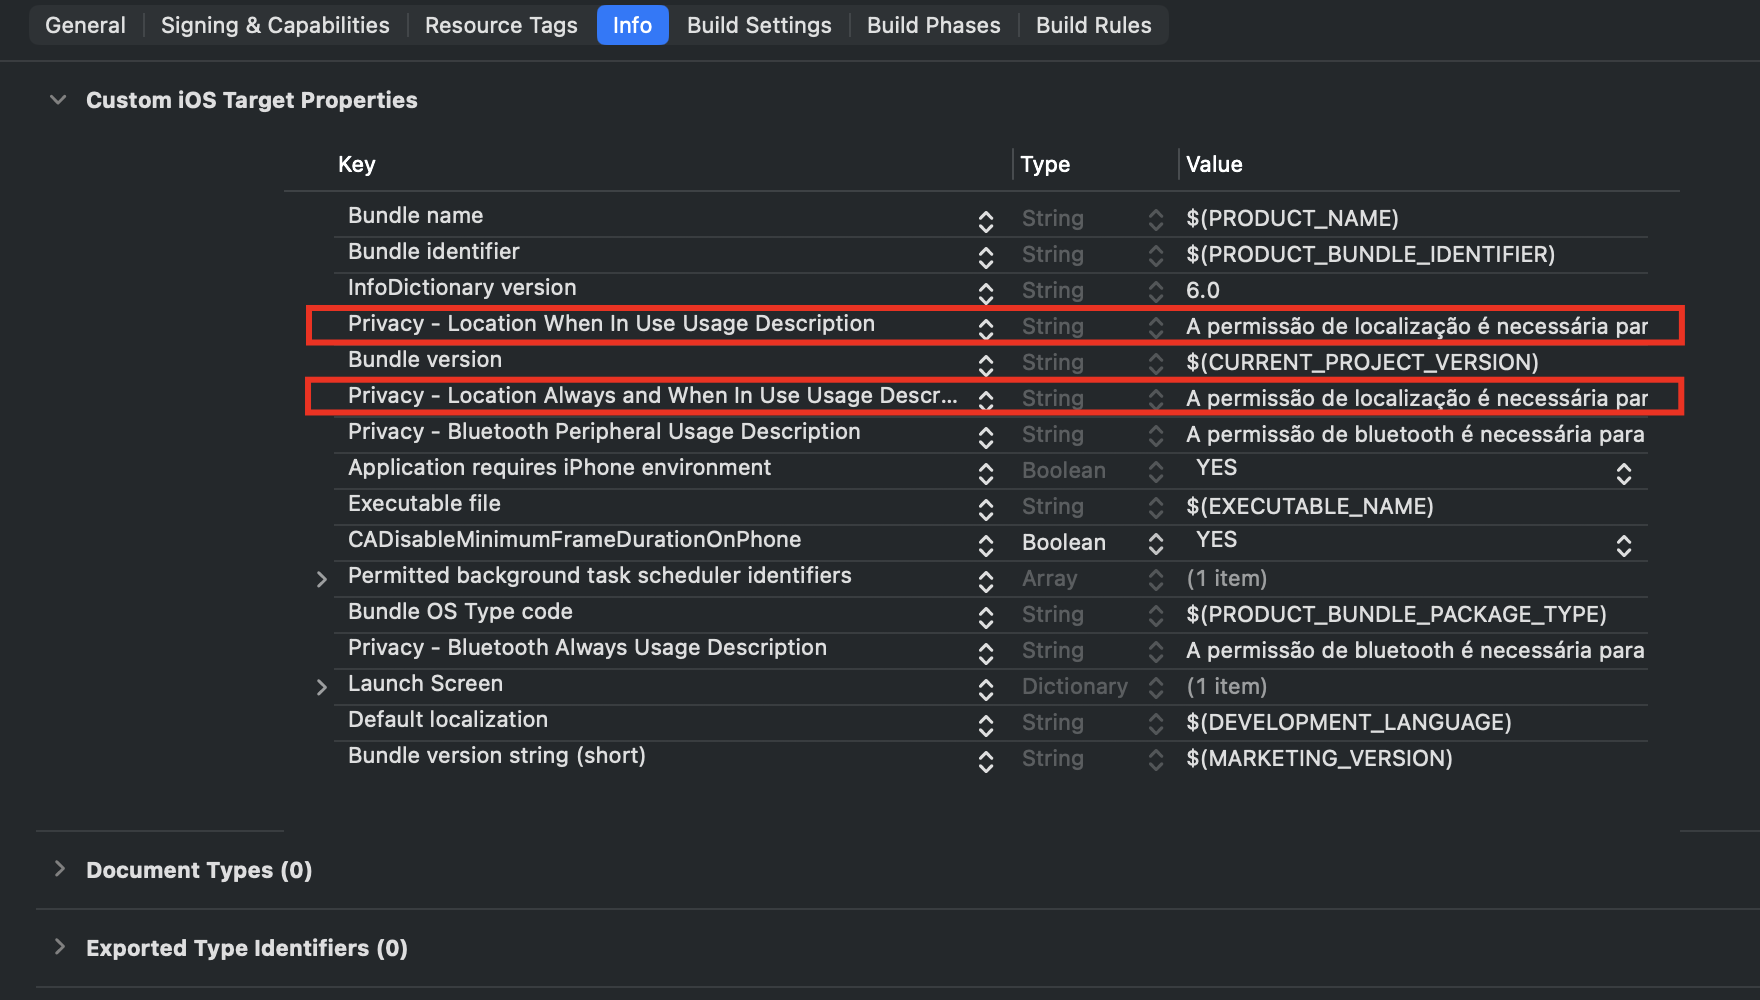
To obtain beacon range results, Group Link technology requires Always location authorization. When implementing location services in your app, Apple requires the following keys to be added to your Info.plist file:
NSLocationWhenInUseUsageDescriptionNSLocationAlwaysAndWhenInUseUsageDescription
Example Description: Location helps ensure more accurate readings and correct alerts about water consumption. This allows the app to deliver consumption data from your home.
Enable Bluetooth Services
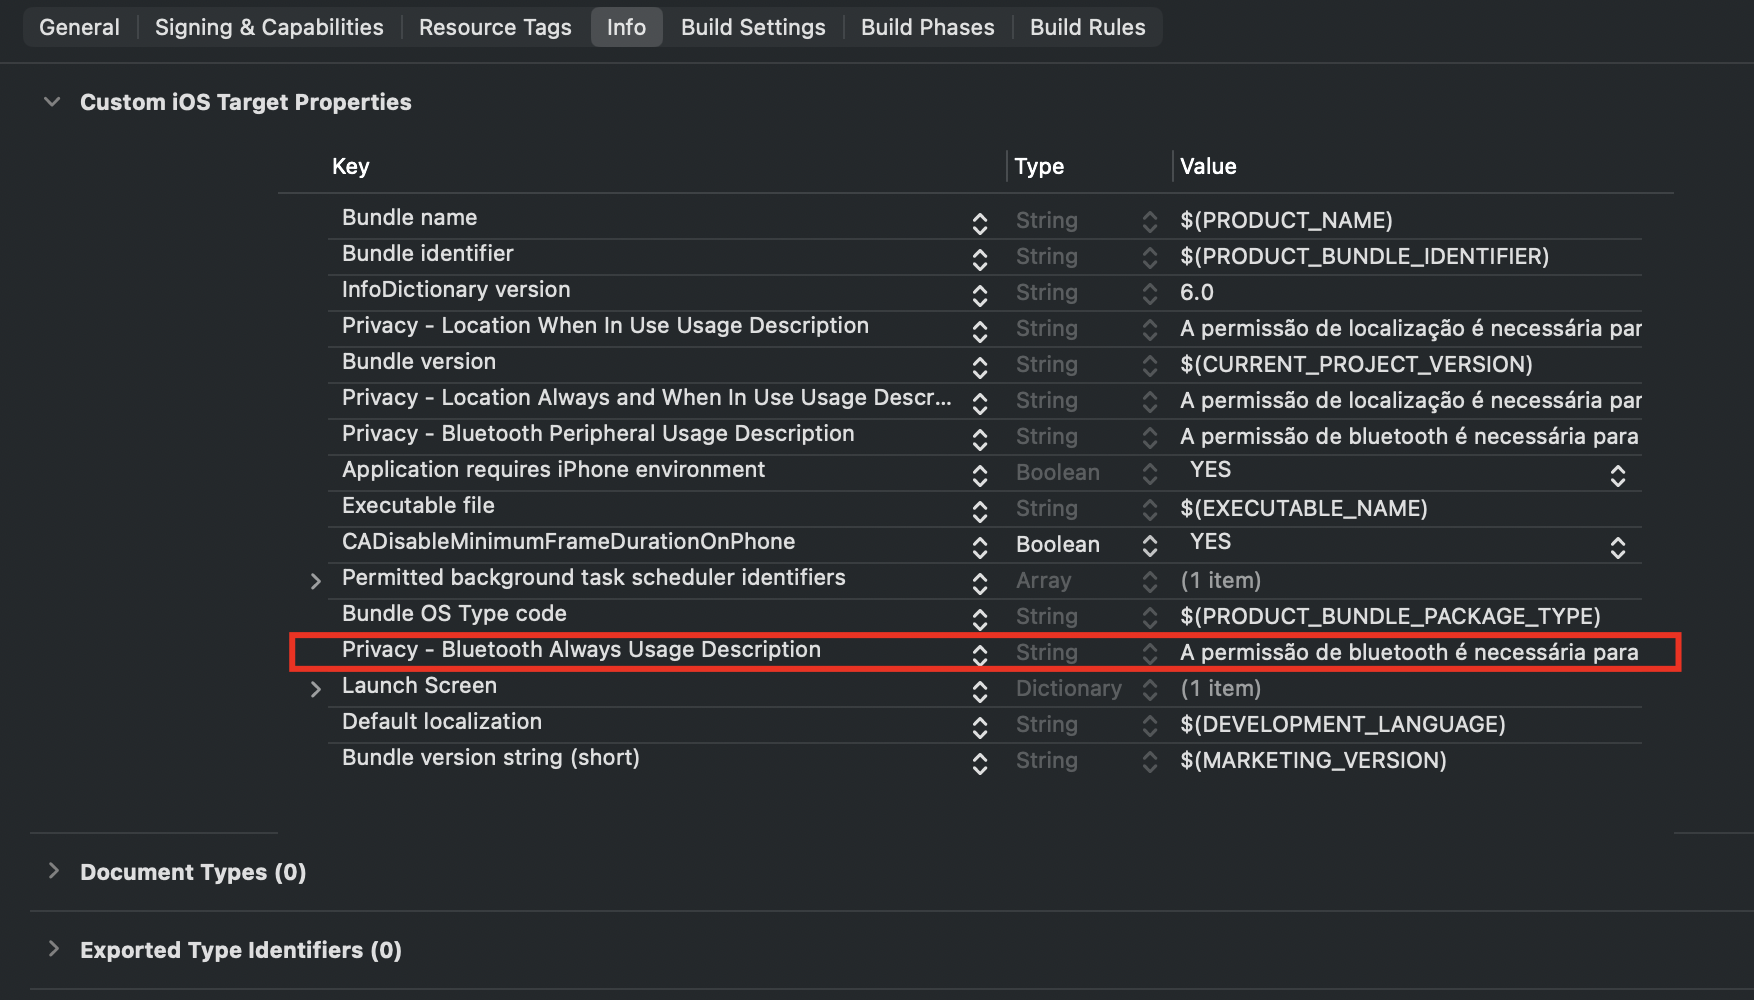
Since iOS 13, apps are required to add the Bluetooth permission key to the Info.plist file.
NSBluetoothAlwaysUsageDescription
Example Description: To ensure the quality of consumption readings, the app needs to access Bluetooth, which helps collect data more accurately.
Apps supported for iOS 12 and below
If your application can run on older versions of iOS (iOS 12 and below), you will need to place the Bluetooth Peripheral key within your Info.plist file:
NSBluetoothPeripheralUsageDescription
Example Description: To ensure the quality of consumption readings, the app needs to access Bluetooth, which helps collect data more accurately.
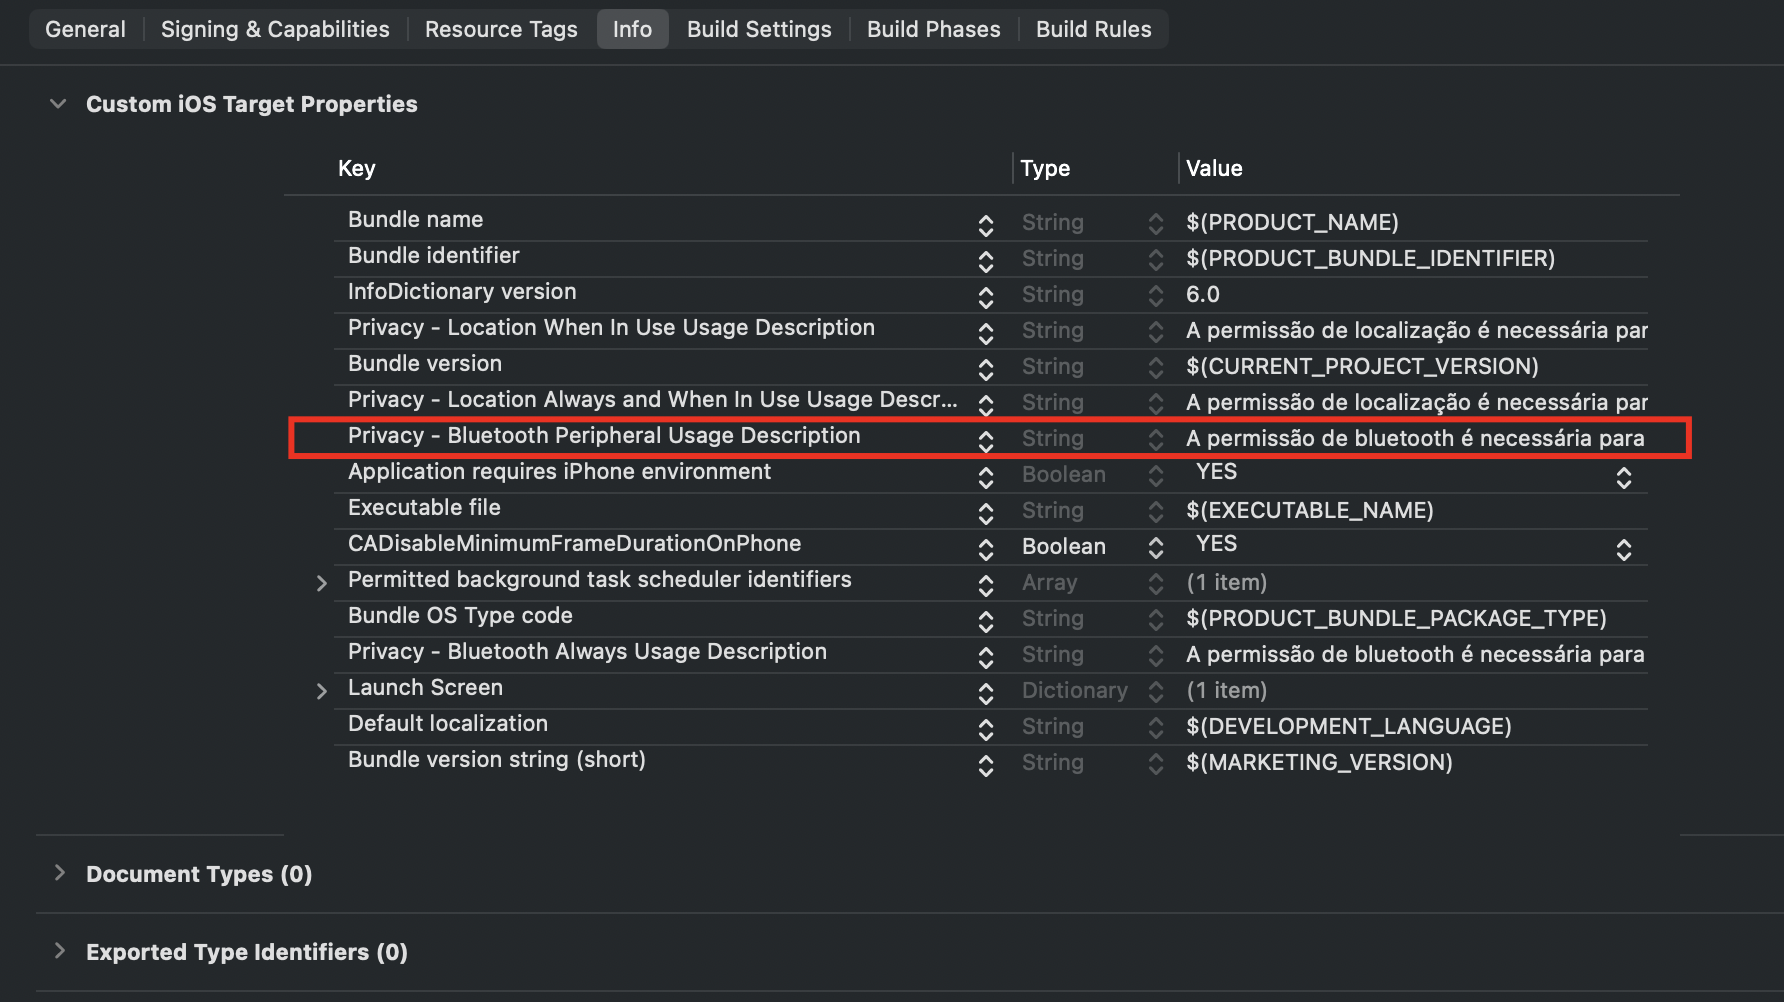
Enable background task functionality
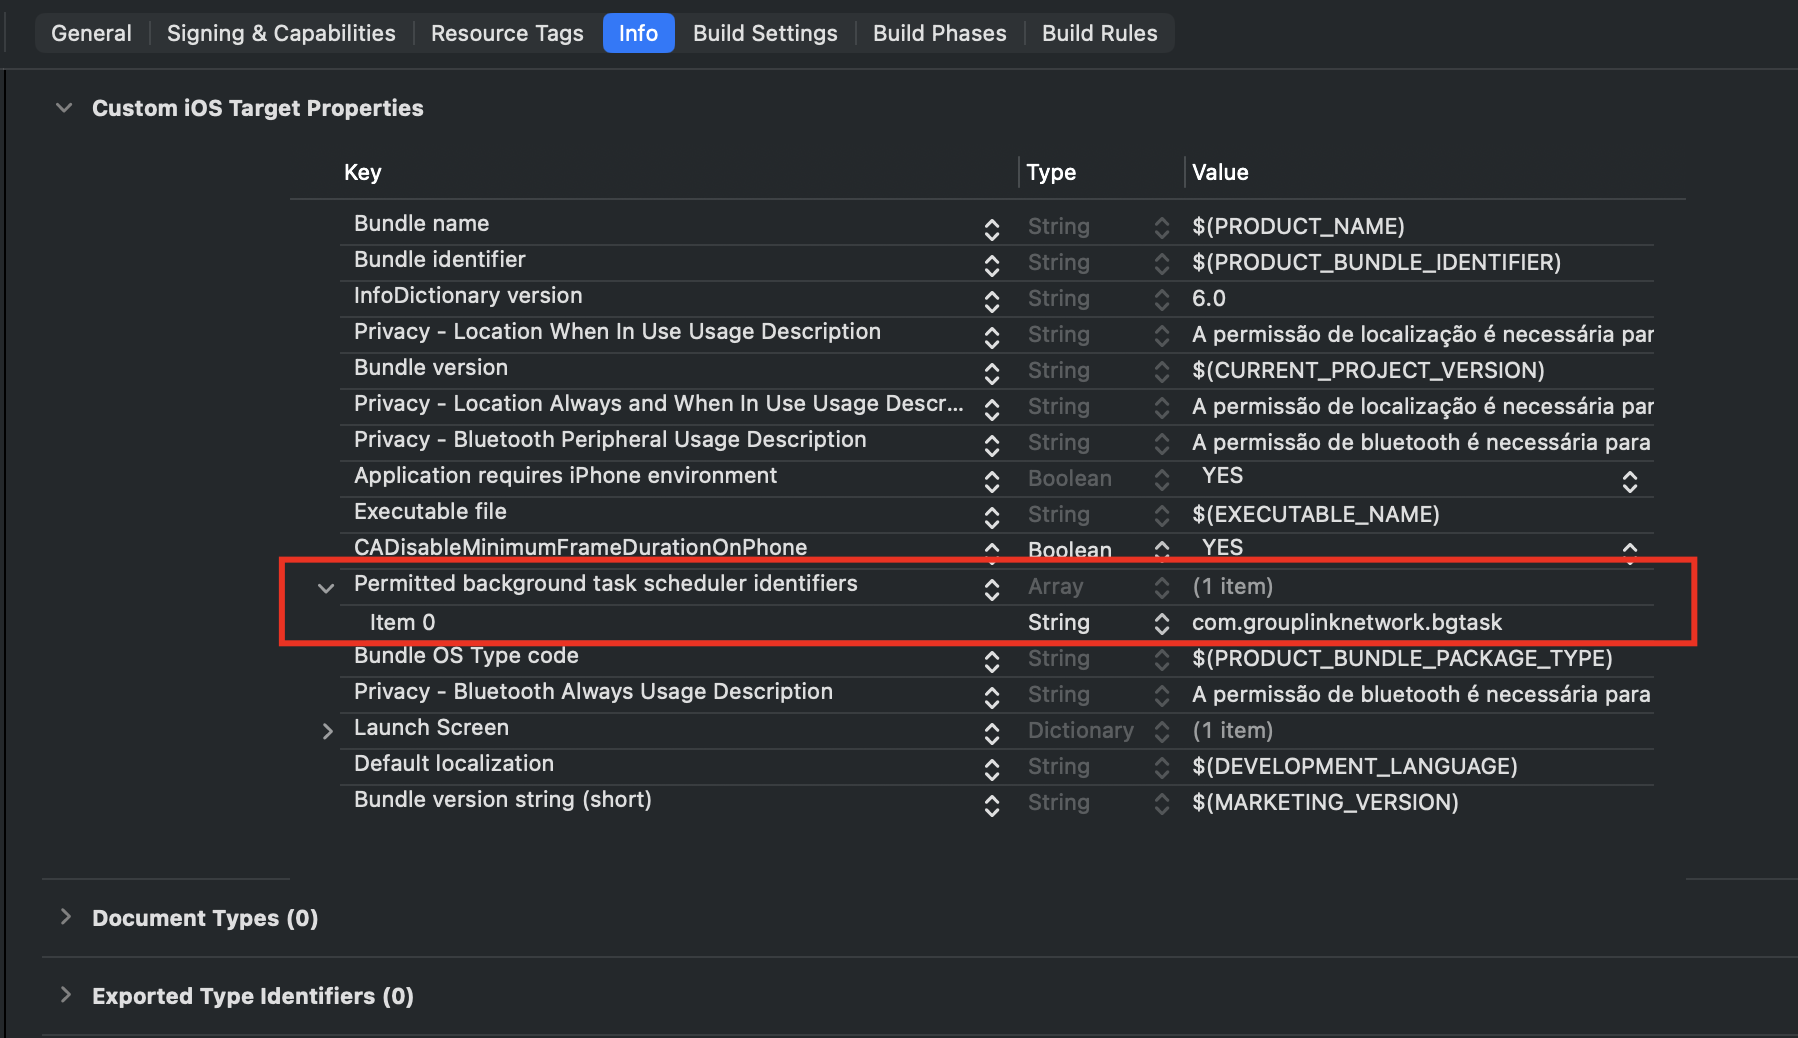
To enable background tasks in your application, you need to insert the following key into your Info.plist file:
BGTaskSchedulerPermittedIdentifiers
Open the created key, Permitted background task scheduler identifiers, and enter our identifier:
com.grouplinknetwork.bgtask
Step 4 - Signature Permissions and Capabilities
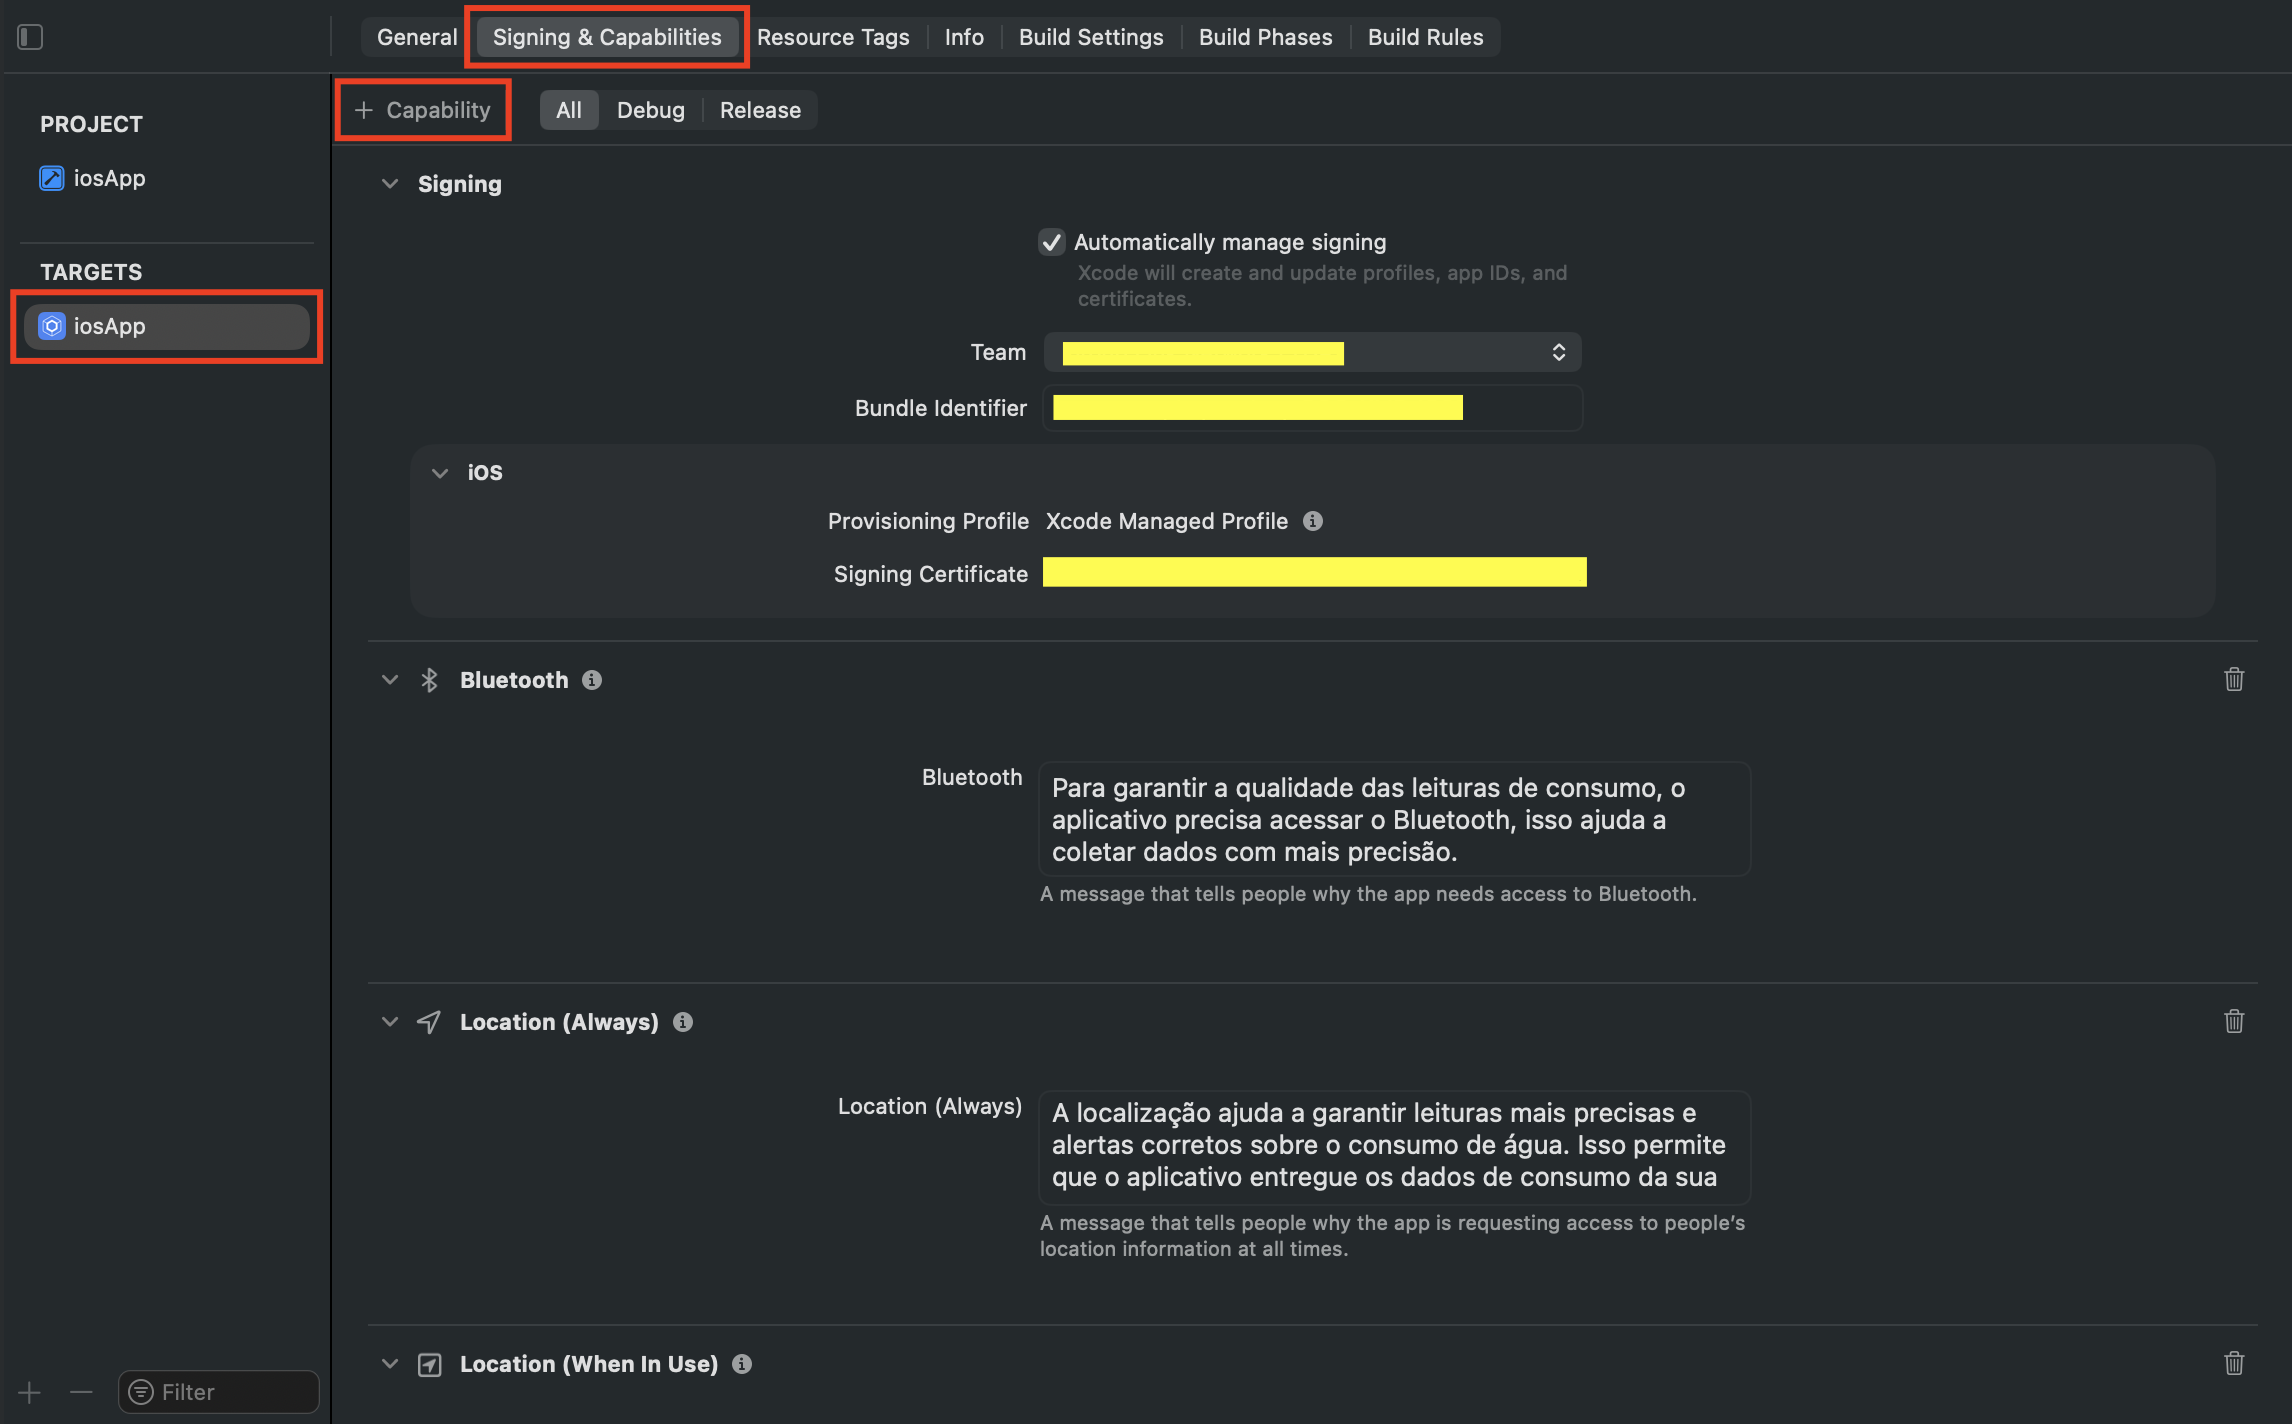
- Select the application's target in
TARGETS. - Access the
Signing & Capabilitiestab. - Click the
+ Capabilitybutton to add the following capabilities:
Enable Access to WiFi Information
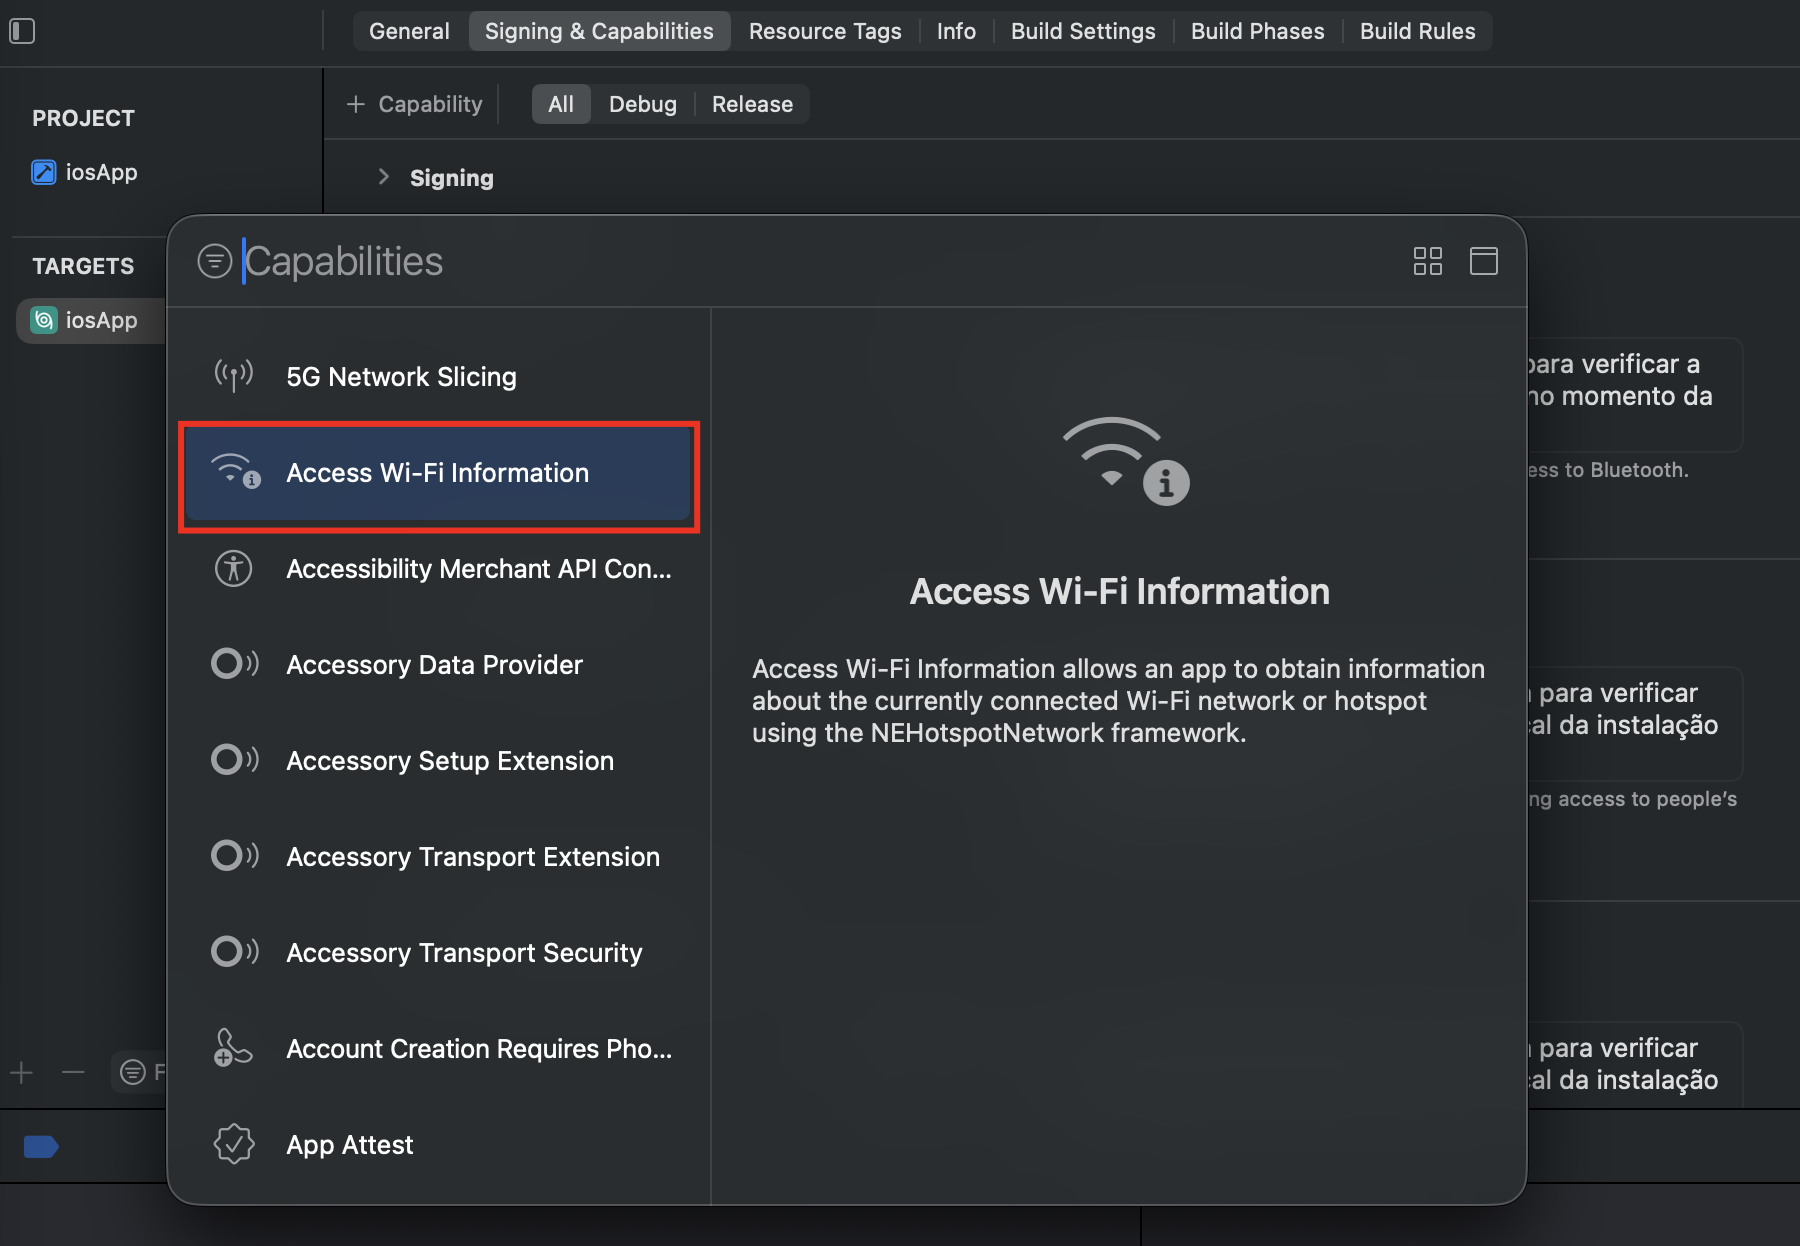
Your application must be able to access WiFi network information for Group Link technology to function correctly. To achieve this, you must add the following capability:
Access WiFi Information
Enable Necessary Background Modes
Your application must be able to run in background modes for Group Link technology to function correctly. To achieve this, you must add the following capability:
Background Modes
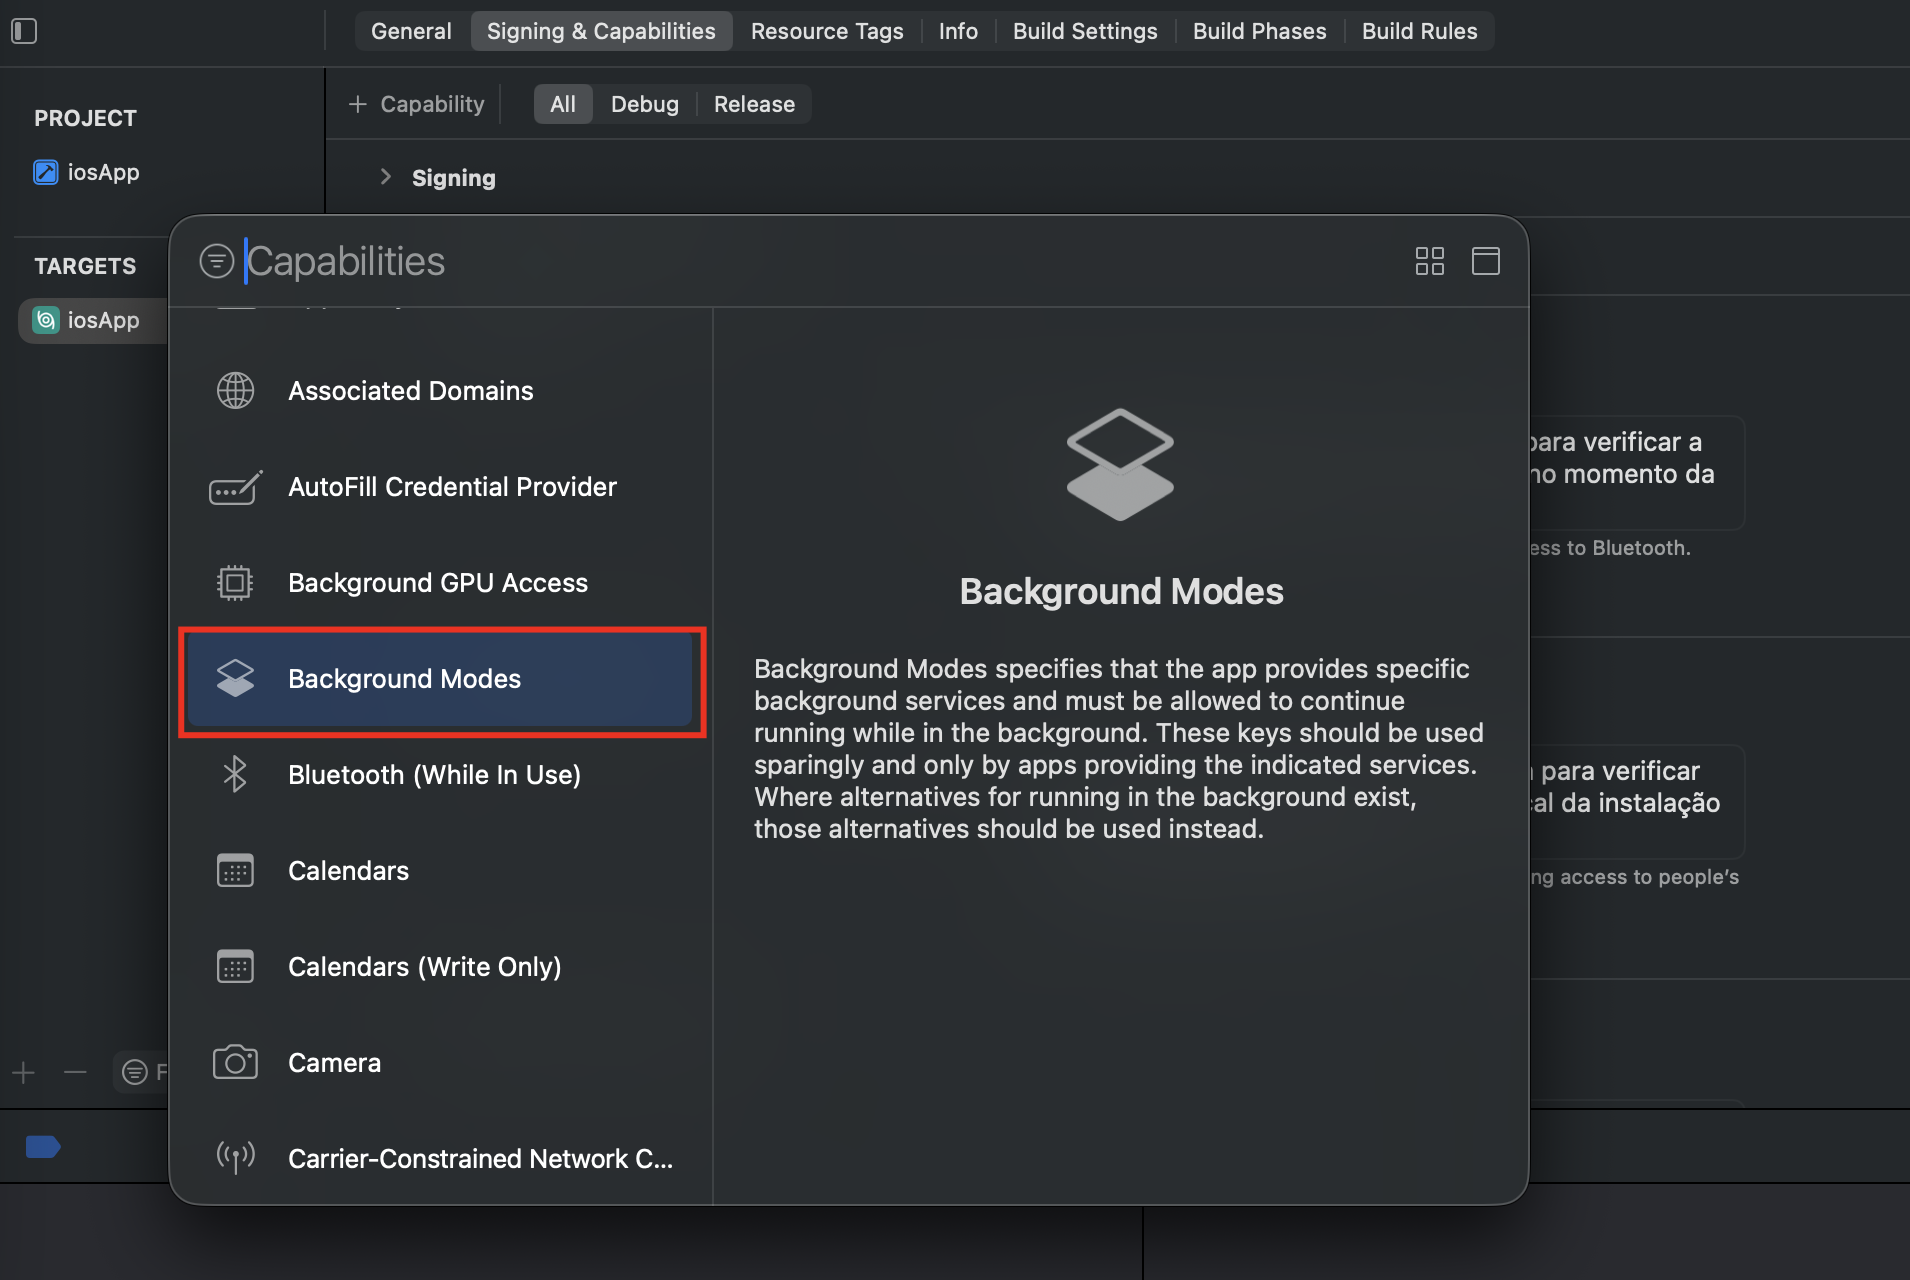
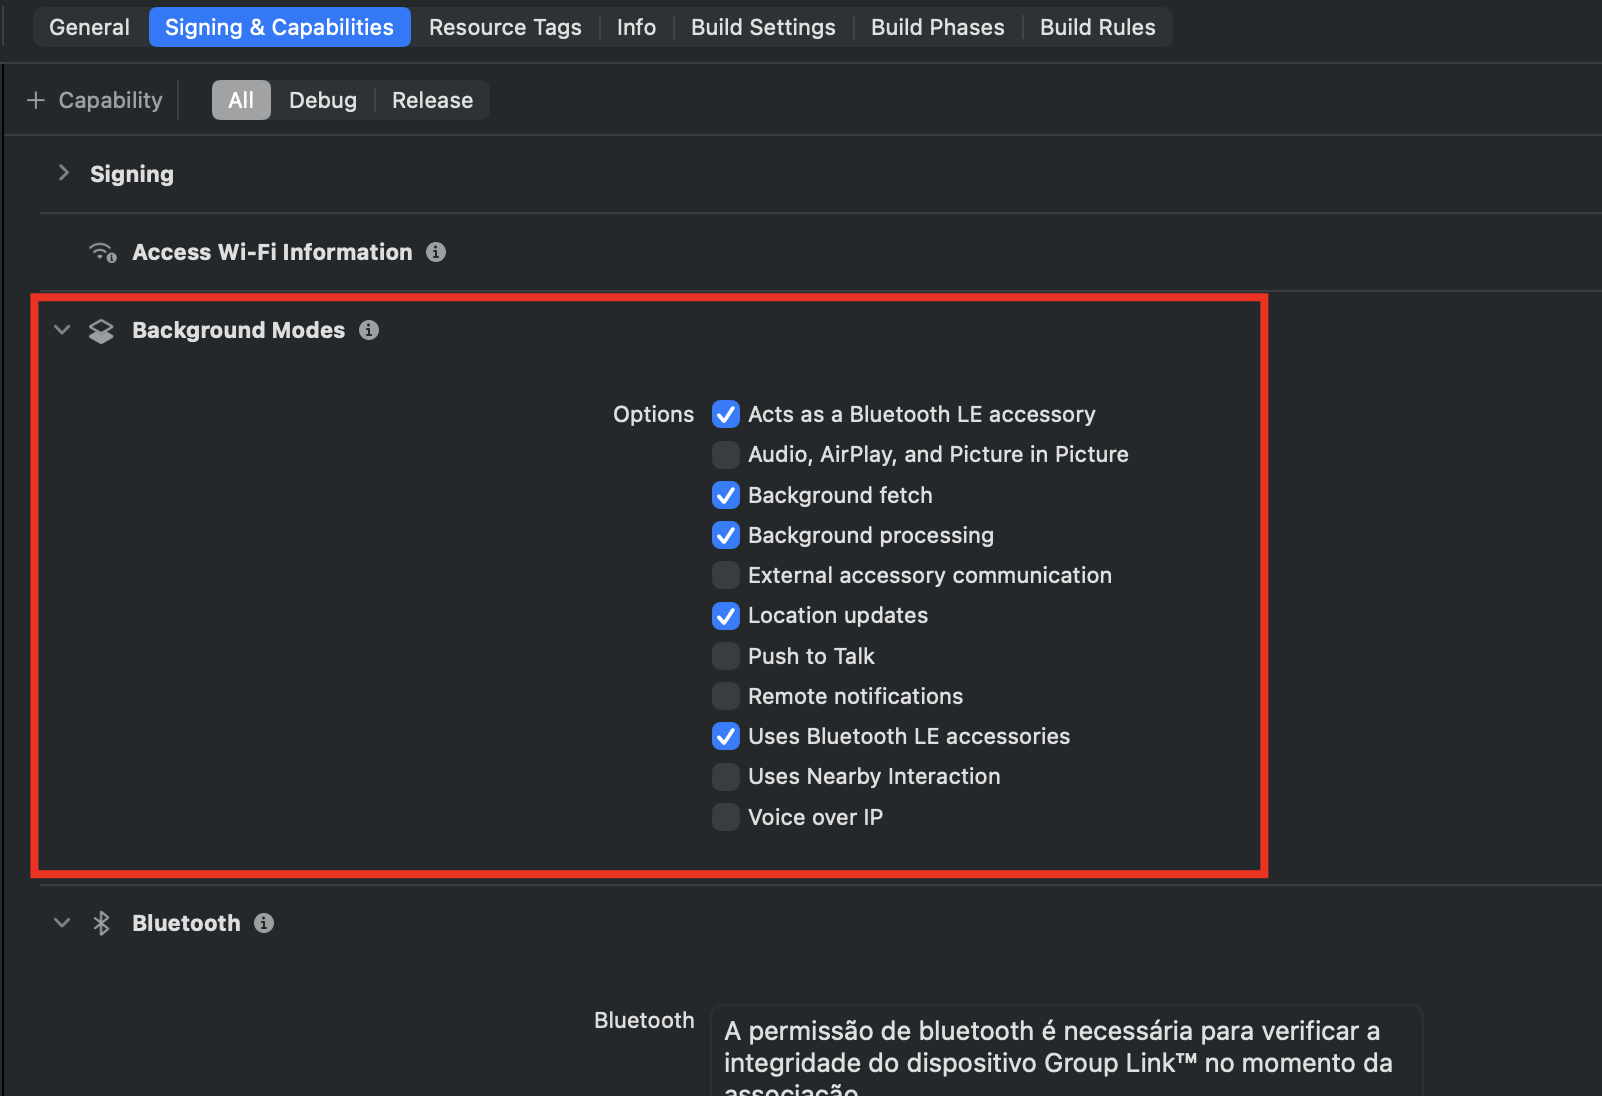
Select the following authorizations from the list:
- Location updates
- Uses Bluetooth LE accessories
- Acts as a Bluetooth LE accessory
- Background fetch
- Background processing
Step 5 - Installing the Group Link package
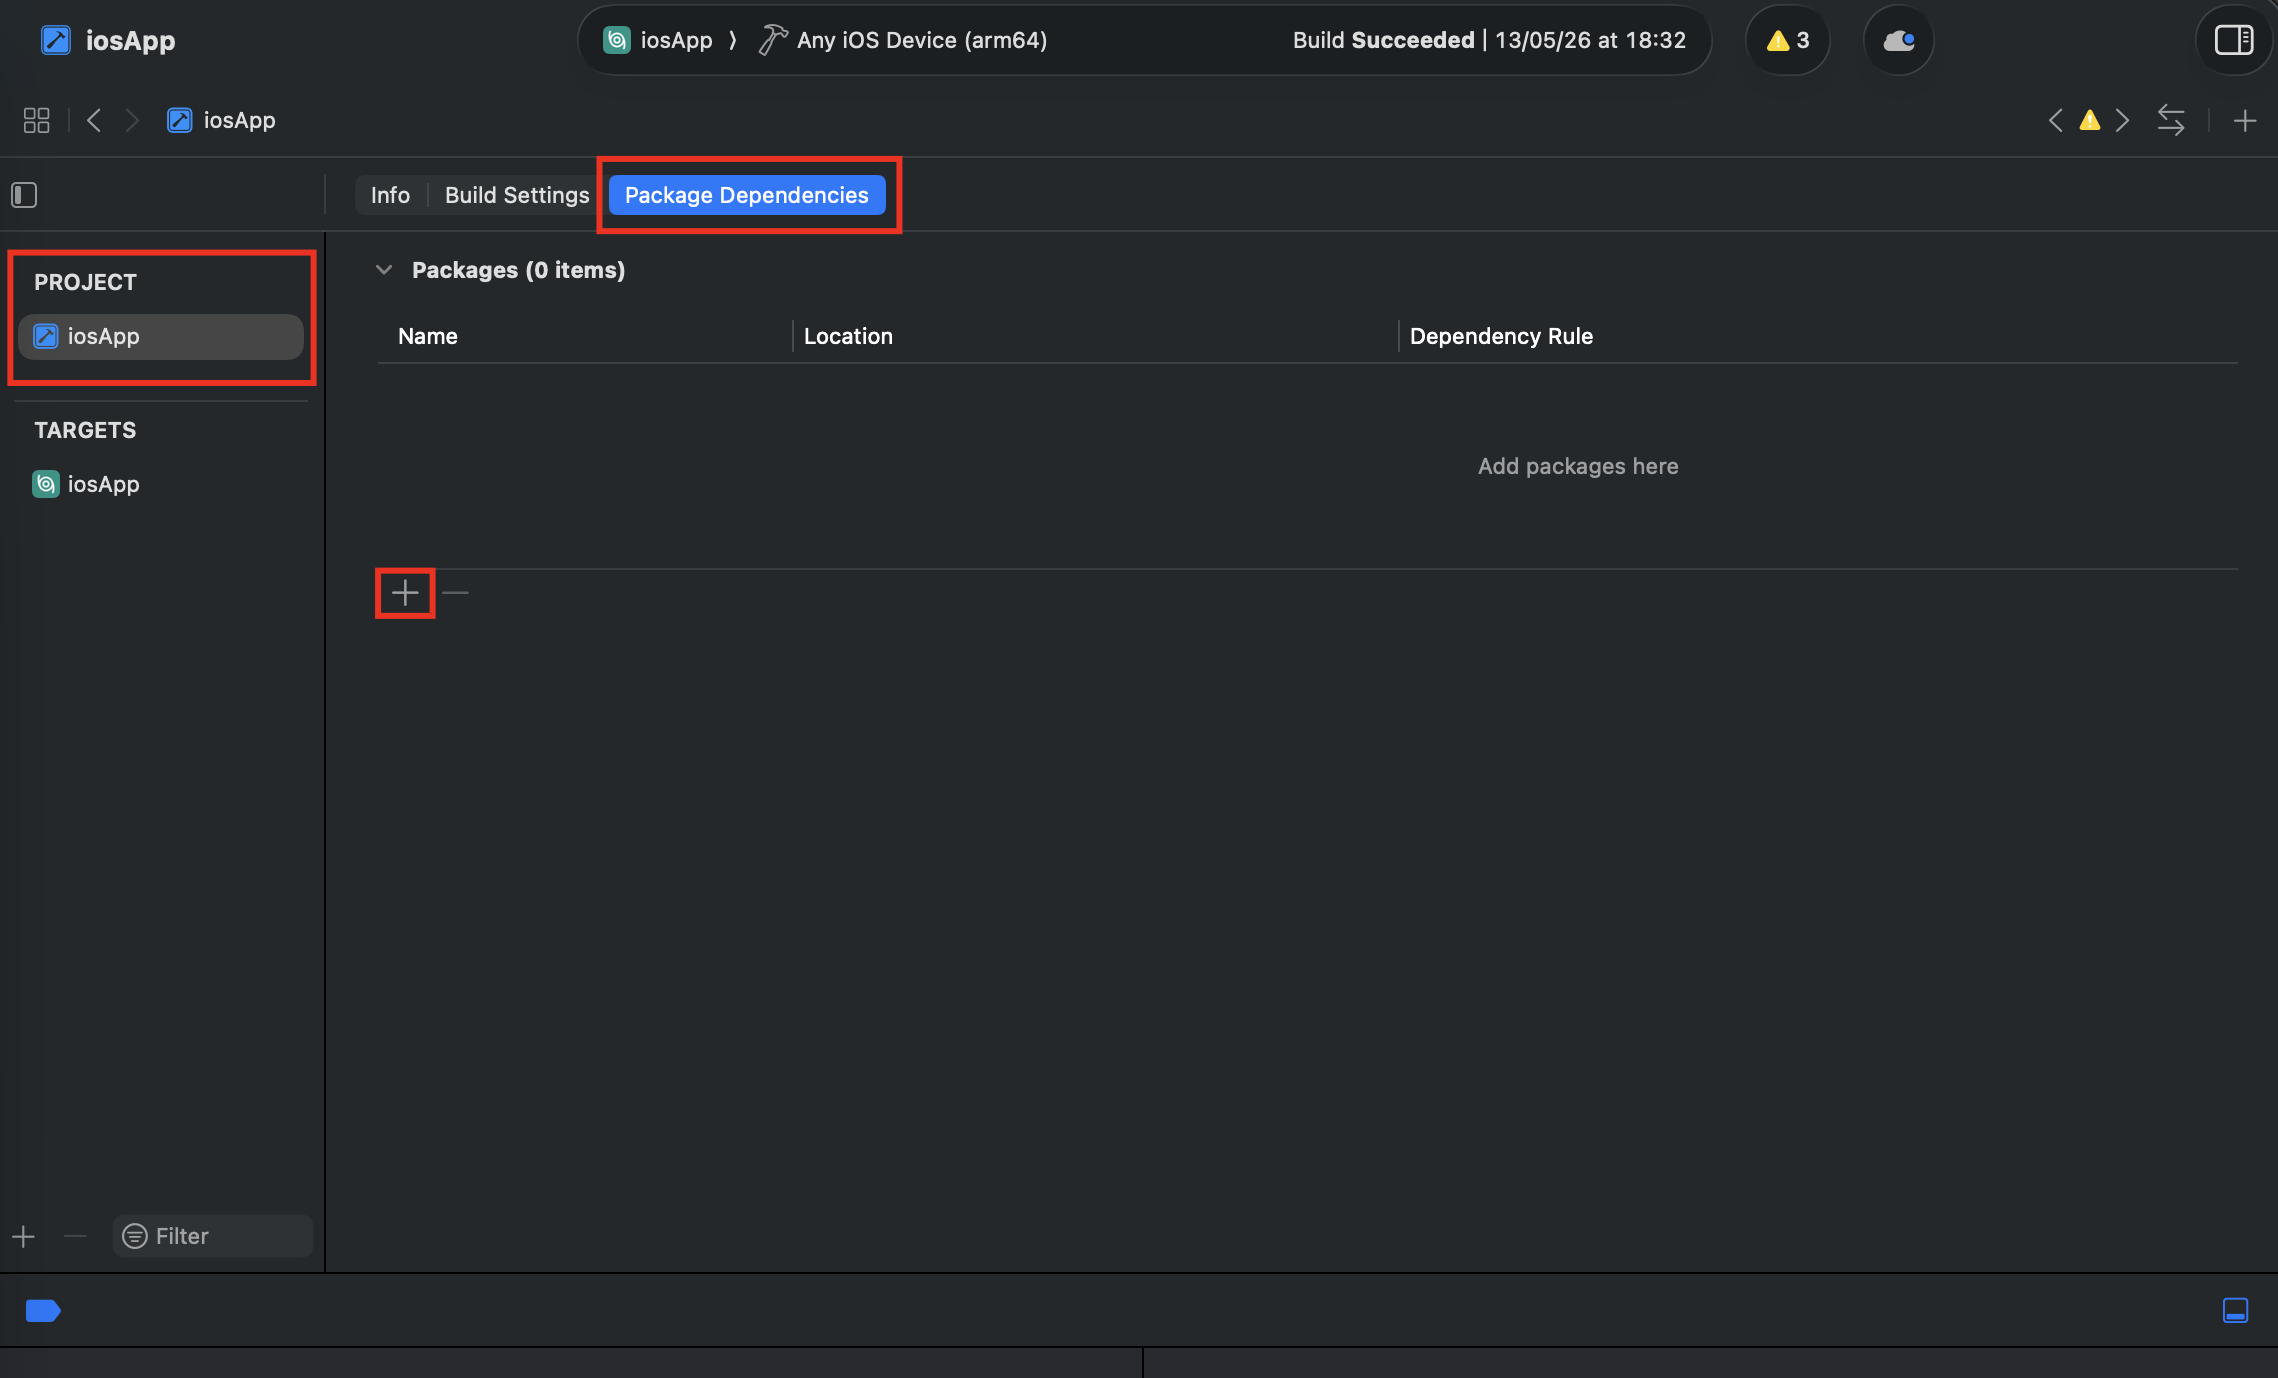
Adding a new package to your project
- In Xcode, locate the panel on the left and click on your
PROJECT. - At the top of the open window, click the
Package Dependenciestab. - The list of packages used in the project will appear.
- Click the
+button located in the lower left of this list to add a new package.
Searching for the package via the GitHub URL
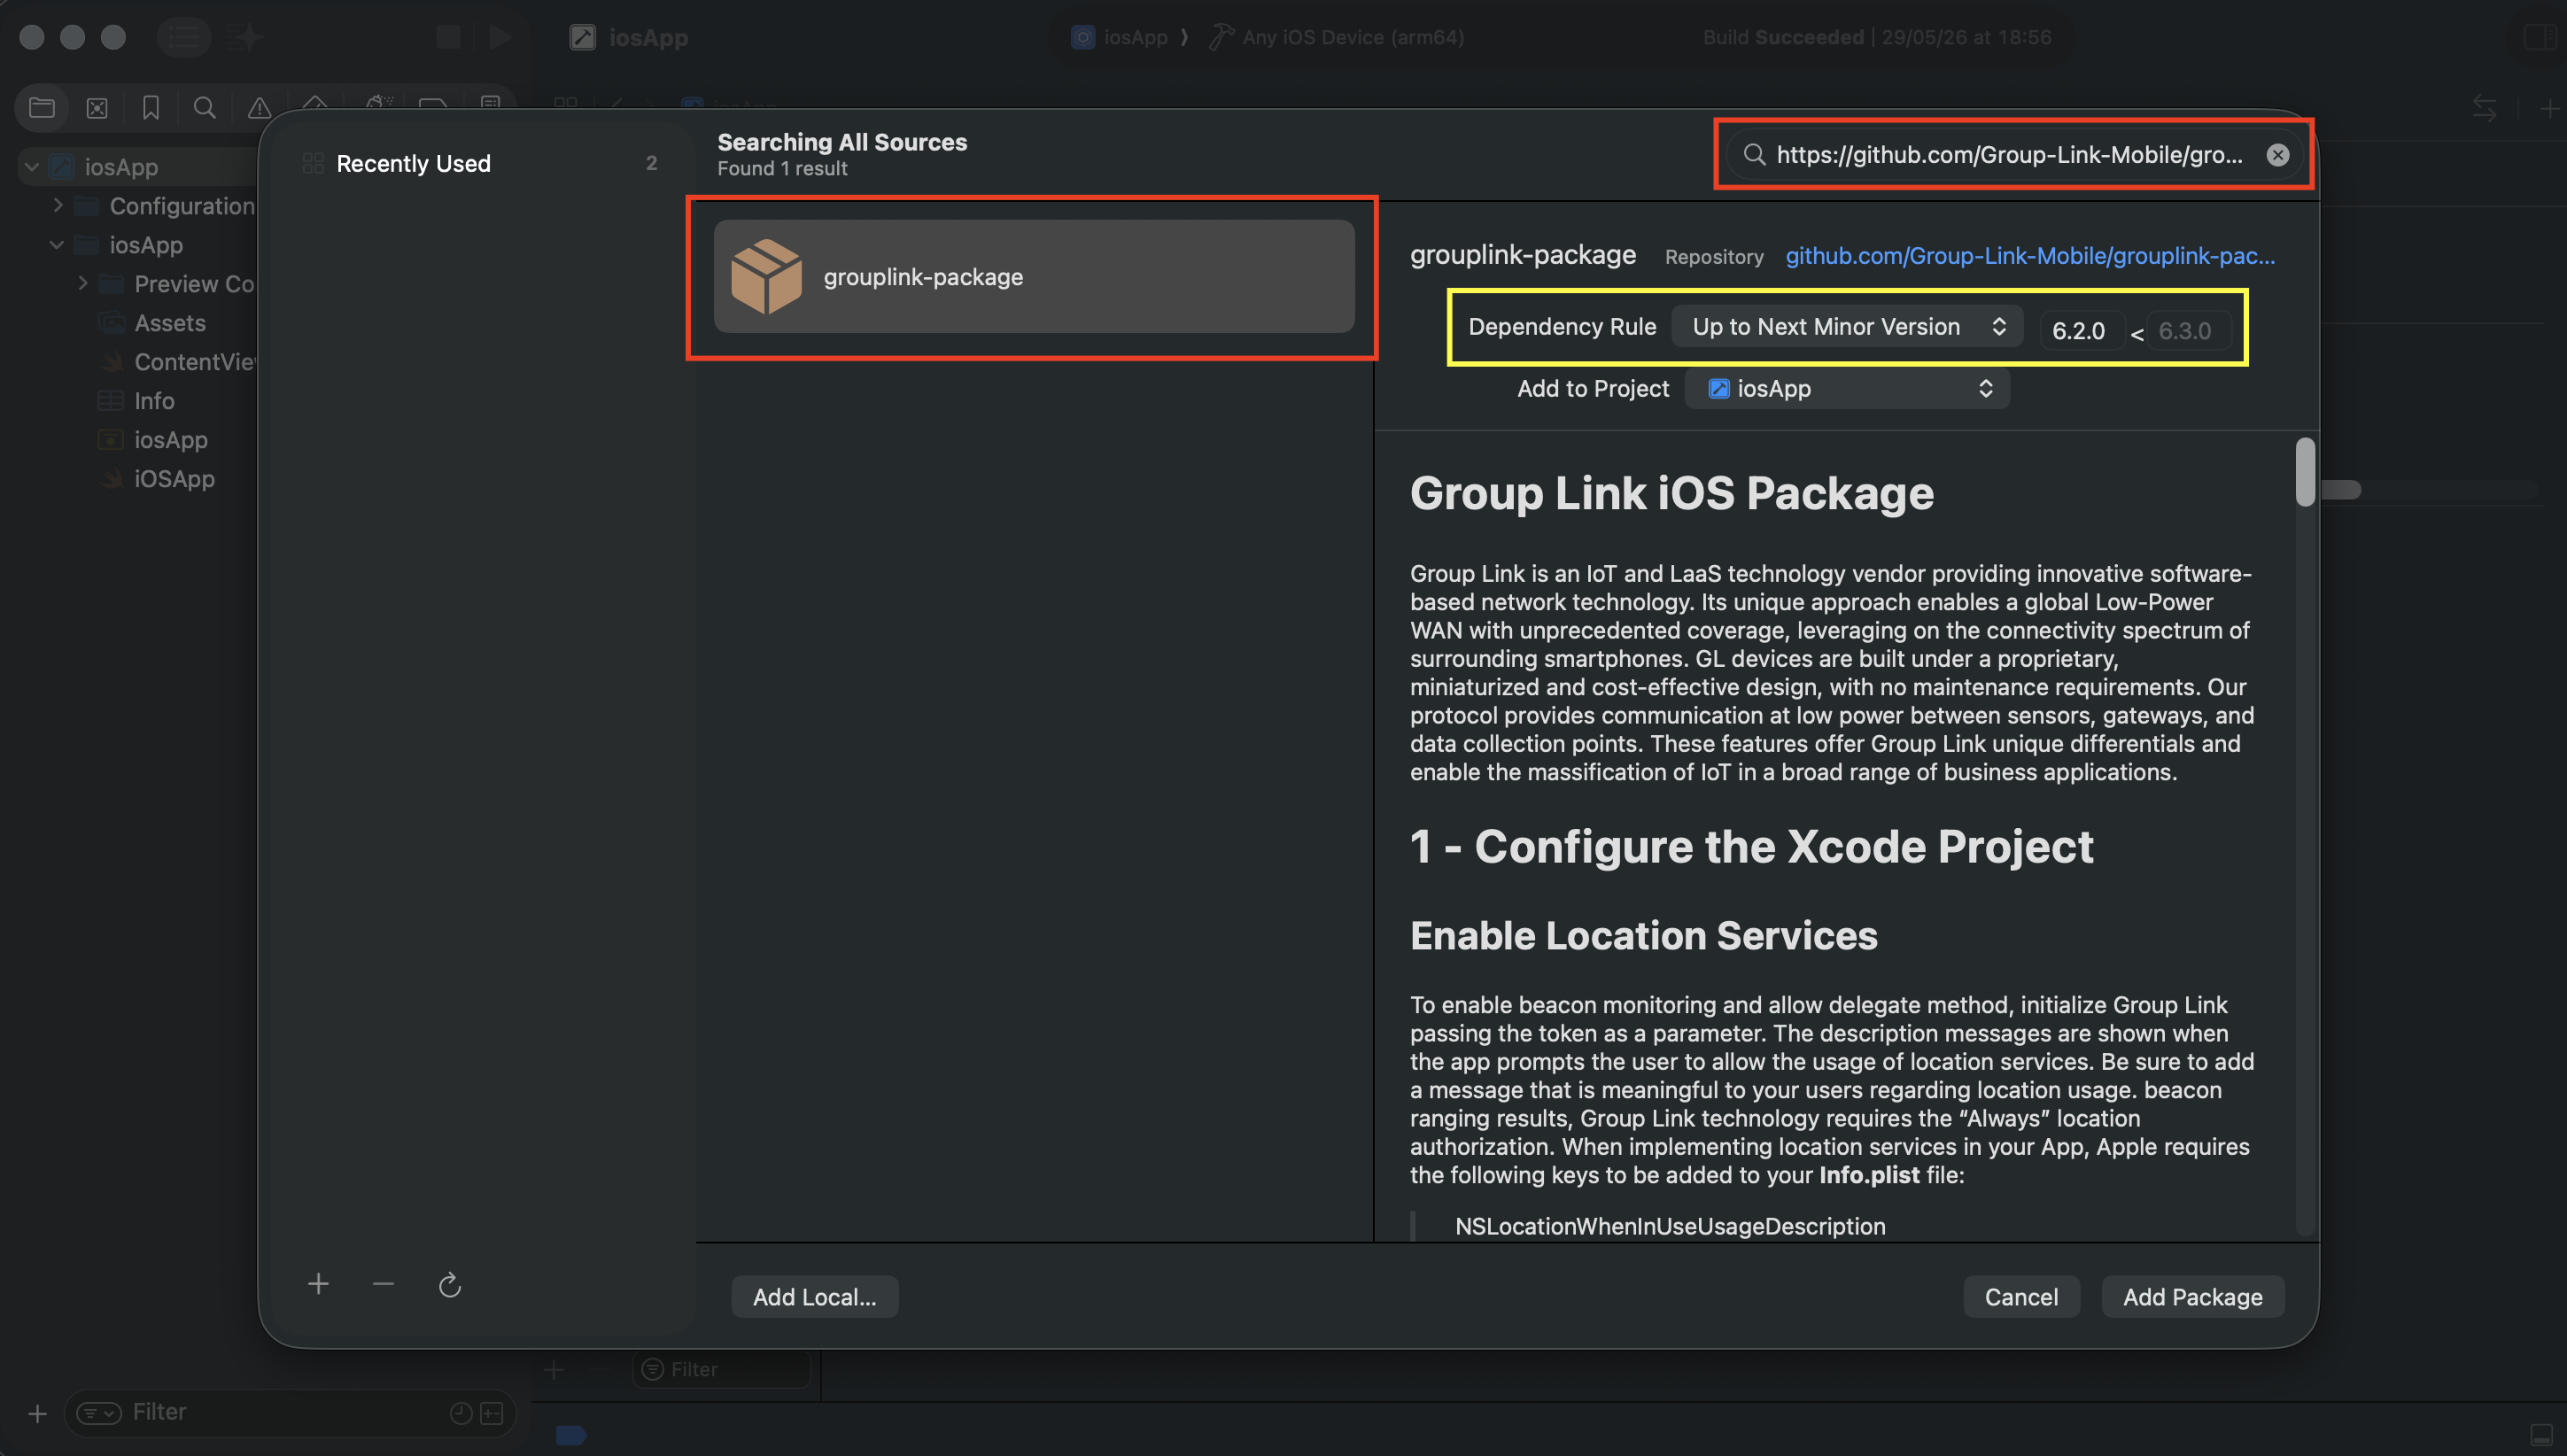
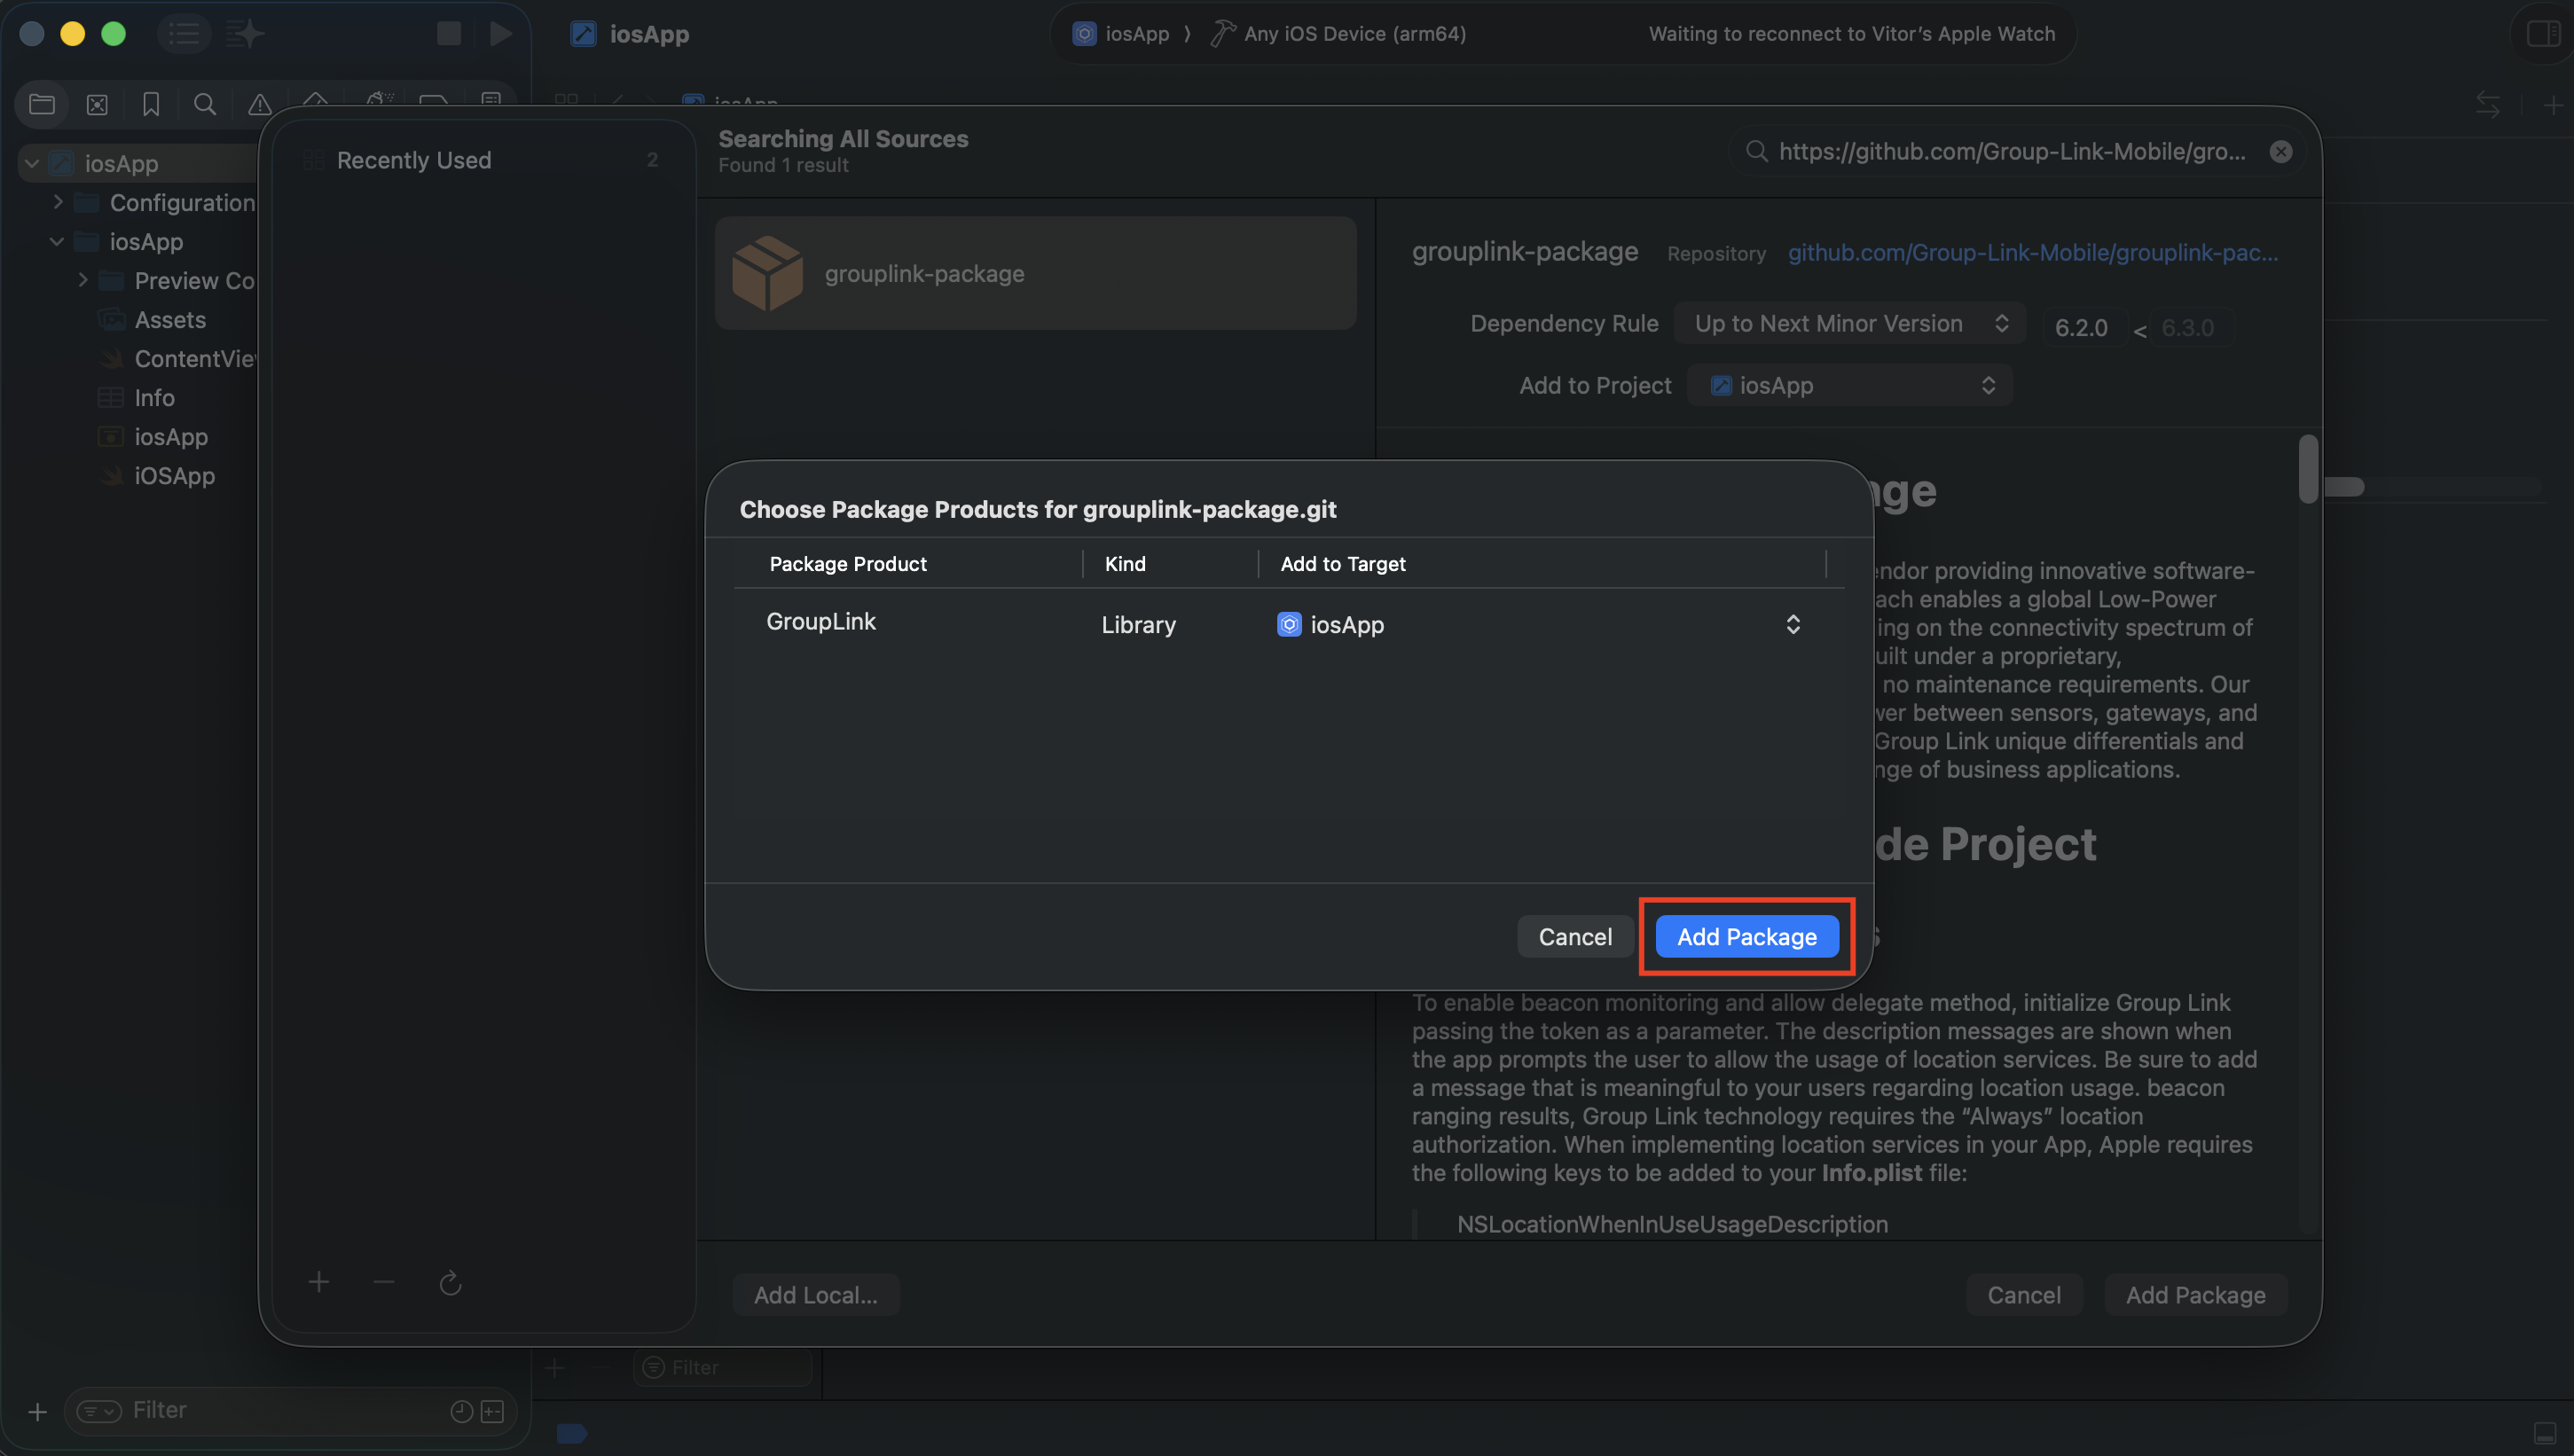
- In the search field, in the upper right corner of the window, paste the repository URL:
https://github.com/Group-Link-Mobile/grouplink-package - In a few moments, the result
grouplink-packagewill appear in the list. - Click on the
grouplink-packageto select it. - Change the
Dependency RuletoUp to Next Minor Versionand add the version6.2.0. - Click
Add Packageto add thegrouplink-packageto the project.
⚠️ Attention: In the
Dependency Rule, do not use the optionsUp to Next Major Version,Branch,Exact Version,Range of VersionsorCommit. The correct configuration isUp to Next Minor Version → 6.2.0. This configuration ensures that you will always use a compatible SDK version published by Group Link.
Choosing the products for the package
Xcode will resolve the package and open the Choose Package Products for grouplink-package.git window.
- Check if the GroupLink package is in the list.
- In the
Add to Targetcolumn, confirm that it is associated with your application. - Click
Add Packageto confirm adding the package.
Verifying the installation
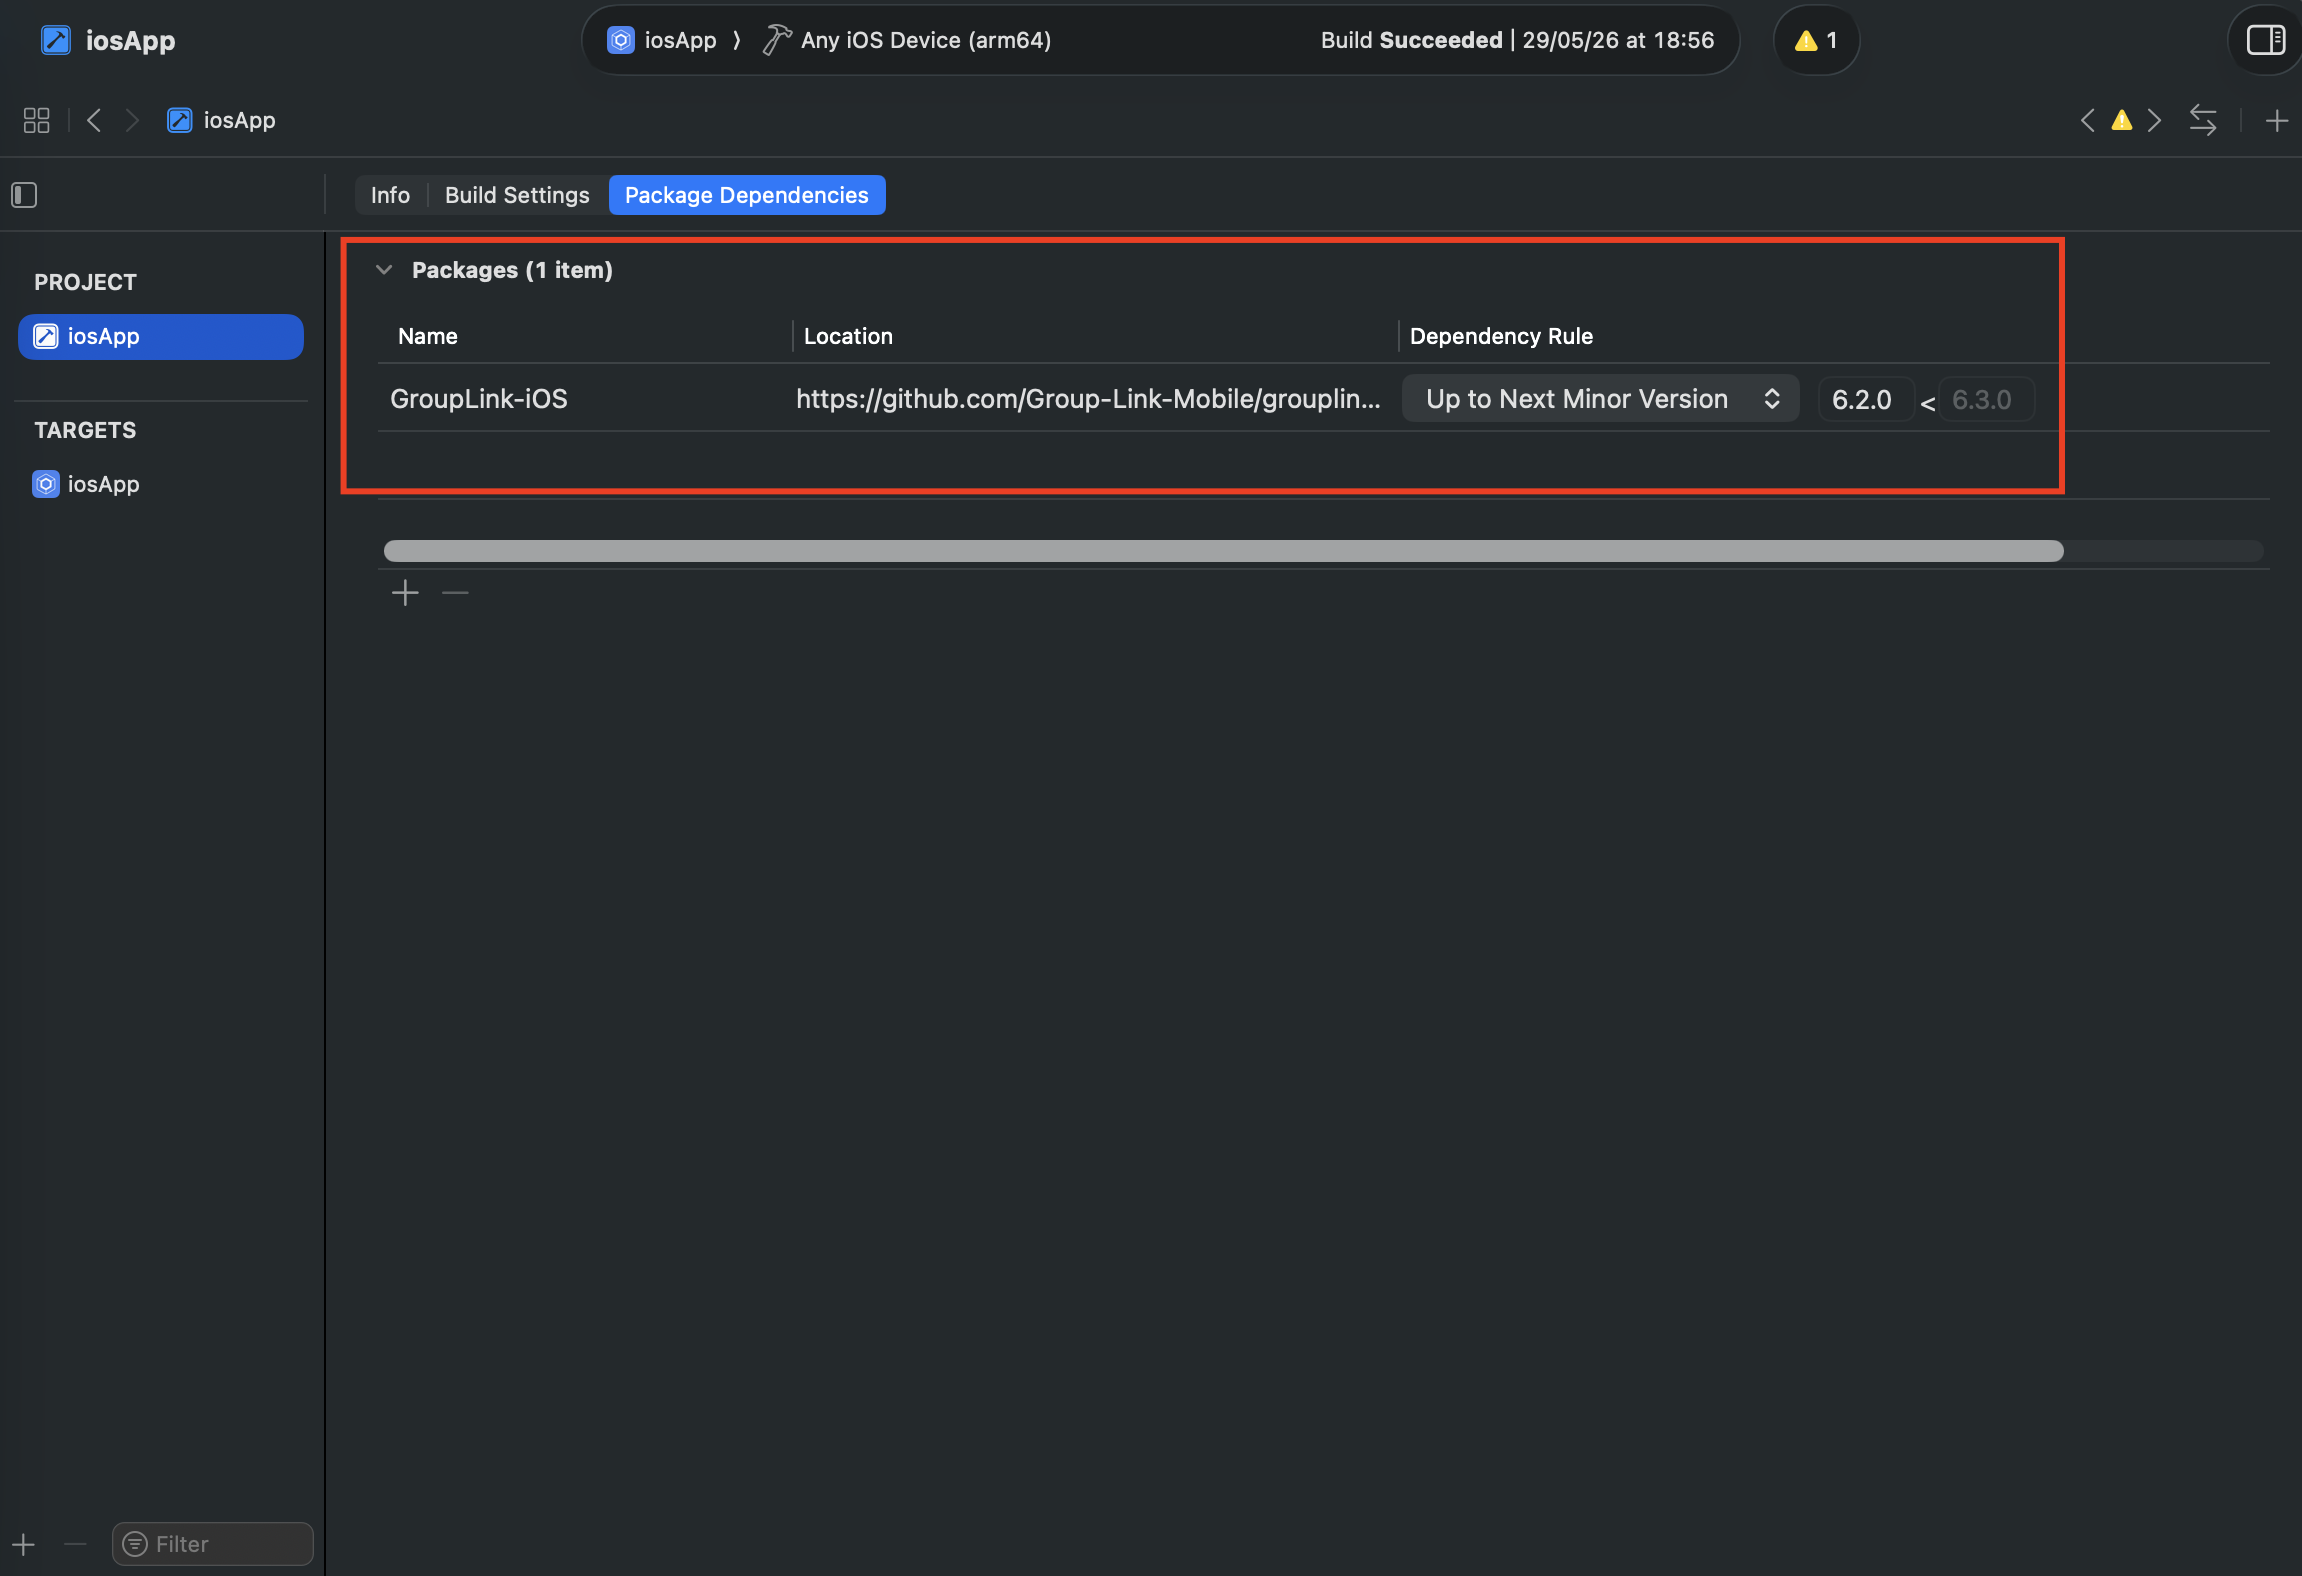
After completion, you will return to the Package Dependencies tab. There, confirm that everything is correct:
- The list should now display the
GroupLink-iOSpackage. - The
GroupLink-iOSpackage appears with:- Location:
https://github.com/Group-Link-Mobile/grouplink-package - Dependency Rule:
Up to Next Minor Version - Value:
6.2.0
- Location:
Step 6 - Starting the Group Link SDK
To initialize the SDK, you need to pass your authentication Token (provided by Group Link).
- Import the SDK library.
- In the
startmethod, specify your authenticationToken(provided by Group Link) in thewithTokenparameter. - Call the
startBluetoothandstartLocationmethods to request Bluetooth and Location permissions.
import SwiftUI

import GroupLink // <---- Importing the Group Link SDK

@main
struct iOSApp: App {
    init() {
        // 1 - Initializing the SDK Group Link
        GroupLinkSDK.start(withToken: "YOUR_GROUP_LINK_TOKEN")

        // 2 - Requesting Bluetooth permission
        GroupLinkSDK.startBluetooth()

        // 2 - Requesting Location Permission
        GroupLinkSDK.startLocation()
    }

    var body: some Scene {
        WindowGroup {
            ContentView()
        }
    }
}
Now that the Group Link SDK for iOS is implemented and the native features are configured, your KMP app is ready to interact with our ecosystem!